How to Make a Solar Panel With Aluminum Foil | Step-by-Step Guide
In the realm of renewable energy, crafting your solar panel is a promising venture that not only slashes costs but also allows you to contribute to a sustainable future.
This comprehensive guide will walk you through the intricate yet rewarding process of creating a solar panel using a surprising hero – aluminum foil.
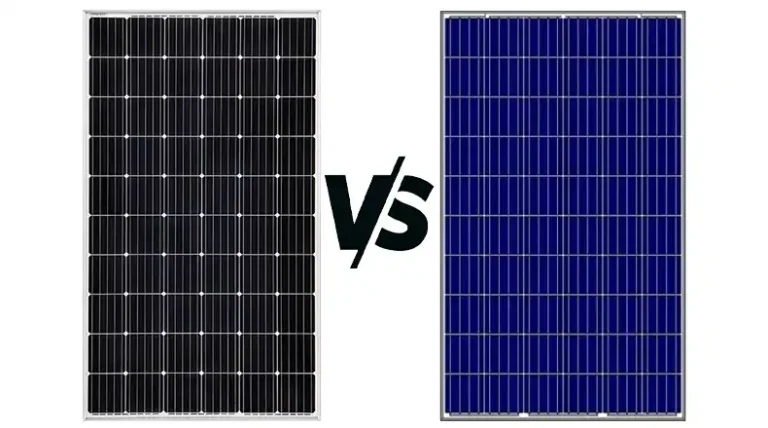
Knowing How Solar Panels Work
Solar panels, those sleek panels adorning rooftops and landscapes, aren’t just eye-catching technological marvels – they’re the workhorses of renewable energy. To comprehend their significance, it’s crucial to unravel the intricate dance of science that takes place within these photovoltaic marvels.
What Are The The Essence of Photovoltaic Magic
At the heart of solar panels lies the wizardry of photovoltaic cells. These tiny but mighty cells are armed with the extraordinary ability to convert sunlight into electricity. When sunlight, or more specifically photons, interacts with these cells, a mesmerizing process unfolds.
The photons knock electrons loose from their atoms, generating an electric current in the process – a phenomenon aptly termed the photovoltaic effect.
Breaking Down the Photovoltaic Process
Let’s simplify the magic. Picture each photovoltaic cell as a mini-powerhouse. Sunlight bombards these cells, exciting electrons and creating an electric flow. This flow, now in the form of direct current (DC), is the birth of the solar power we harness.
From DC to Usable AC: The Inverter’s Role
Now that we have a stream of direct current, the next hero in our solar saga is the inverter. Think of the inverter as the translator, transforming the DC into alternating current (AC) – the electricity we use in our homes. This conversion is vital because most household appliances operate on AC power.
What Are The The Inverter’s Dance
The inverter’s task may seem straightforward, but its precision is paramount. It ensures the electricity produced by your solar panels aligns seamlessly with the grid and your home’s energy needs. Like a conductor leading an orchestra, the inverter harmonizes the energy flow for optimal usage.
Sunlight to Socket: Navigating the Grid Connection
With electricity now in a form familiar to our homes, the solar-generated power seamlessly integrates with the electrical grid.
This means that when your panels produce surplus electricity, it flows back into the grid, potentially earning you credits or reducing your overall energy bill – a symbiotic relationship between your solar setup and the broader energy ecosystem.
What Are The The Grid’s Dual Role
The grid becomes not just a receiver but a giver. When your panels don’t produce enough electricity (hello, nighttime), you draw power from the grid as usual. It’s a dynamic back-and-forth, ensuring a consistent power supply regardless of your solar panel’s current productivity.
The Stored Sunshine: Unraveling Battery Systems
For those looking to enhance self-sufficiency, battery systems come into play. These storage marvels allow you to store excess solar-generated electricity for later use, turning your home into a mini power station. Imagine having the sun’s energy on reserve for a cloudy day or during peak consumption hours.
Time For Battery Power Unleashed
Batteries are the unsung heroes of solar energy independence. They store surplus energy during peak production times and release it when demand peaks or the sun takes a hiatus. It’s like having a personal energy vault, ensuring your home remains powered even when the sun takes a brief vacation.
Wrapping Up the Solar Symphony
In essence, solar panels are not mere fixtures; they are orchestrators of a renewable energy symphony.
From the mesmerizing photovoltaic cells converting sunlight to the rhythmic dance of electrons, the inverter’s translation, grid integration, and the backup provided by battery systems – every element plays a crucial role.
What Are The Advantages of DIY Solar Panels
In the quest for sustainable energy solutions, DIY solar panels emerge as a compelling choice for individuals seeking both eco-friendliness and cost-effectiveness. Let’s delve into the multitude of advantages that come with embarking on the journey of crafting your solar power source.

1. Cost Savings
One of the primary draws of DIY solar panels is the potential for substantial cost savings. By eliminating labor costs associated with professional installations, you can significantly reduce the overall expense of harnessing solar energy for your home.
2. Customization Options
Crafting your solar panel allows for a high degree of customization. Tailor the design and specifications to meet your specific energy needs and the available space on your property. This flexibility ensures a solar solution that aligns perfectly with your requirements.
3. Educational Experience
Engaging in a DIY solar panel project is an educational journey. You not only harness the power of the sun but also acquire valuable knowledge about solar technology, electrical systems, and sustainable practices. It’s a hands-on learning experience with long-term benefits.
4. Environmental Impact
Contributing to a greener planet is a profound advantage of DIY solar panels. By generating clean energy at home, you actively participate in reducing carbon footprints and dependence on traditional energy sources, fostering a more sustainable and eco-friendly lifestyle.
5. Minimal Maintenance
DIY solar panels are designed for simplicity, translating to minimal maintenance requirements. Unlike complex commercial systems, these panels are often easy to troubleshoot and repair. This translates to long-term savings in both time and money.
6. Independence from Energy Grids
Crafting your solar panel provides a degree of independence from traditional energy grids. This autonomy is particularly advantageous during power outages or in remote locations where accessing mainstream energy sources may be challenging.
7. Upgradability
DIY solar panels offer the flexibility to upgrade components as technology advances. You can easily enhance the efficiency of your system by incorporating new solar cell technologies or optimizing other elements, ensuring your setup stays relevant in the ever-evolving field of solar energy.
8. Reduced Payback Period
With the lower initial investment associated with DIY solar panels, the payback period – the time it takes for the system to offset its cost through energy savings – is typically shorter compared to professionally installed systems. This means you start reaping the financial benefits sooner.
9. Community Engagement
Engaging in a DIY solar project opens avenues for community involvement. Share your knowledge and experiences with neighbors or online communities, fostering a collective effort towards sustainable energy practices. It’s a chance to be a solar pioneer in your community.
Step 1: Gathering All The Needed Materials
In the journey to create your own solar panel, the first step is crucial – gathering all the materials required for this exciting DIY project.
To embark on this green adventure, you don’t need a treasure trove; just a handful of easily accessible items will set you on the path to harnessing the power of the sun.
How To Make Solar Panel With Foil Paper – Solar Panel Very Easy
What Are The List of the Essentials
Plywood: The sturdy foundation of your solar panel, providing support and structure.
Glass: A transparent shield, allowing sunlight to penetrate while protecting the internal components.
Aluminum: A surprisingly versatile material, enhancing the efficiency of your solar panel.
Caulk: The unsung hero, ensuring your creation is weatherproof and durable.
A Sharp Utility Knife: Your trusty companion for precision cuts and shaping.
Duct Tape: The handy solution for securing and fastening components in a pinch.
Tin Snips: Essential for cutting aluminum with the ease of scissors, giving shape to your vision.
Electric Drill: A power tool that plays a pivotal role in creating holes for various components.
Bolts: The nuts and bolts that hold everything together, quite literally.
What Are The The Blueprint for Success
Imagine this step as the blueprint for your solar panel masterpiece. Each material has a specific role, contributing to the synergy of your DIY creation. The plywood forms the base, the glass shields and allows light, while aluminum and caulk work together for efficiency and protection.
Time for Setting the Stage
Before you start, take a moment to envision your solar panel taking shape. Picture each material as a crucial piece of the puzzle, coming together to form a sustainable energy solution. The simplicity of these materials belies the complexity of their contribution to your DIY project.
Pro Tip: Check your local hardware store for these items. They are not exotic; they are the building blocks of your solar dreams.
How to Start the Hunt
Gathering materials is not just a chore; it’s a treasure hunt for the components that will power your own energy source. The thrill of finding the perfect plywood, the satisfaction of holding a roll of aluminum, and the promise of what these materials will become – it’s a journey worth savoring.
Giving a Human Touch
Imagine yourself standing in the aisles, shopping for your solar adventure. The smell of fresh plywood, the gleam of aluminum rolls, the feel of a utility knife in your hand – these are the sensory cues of a hands-on project, a project that connects you to the very materials powering your DIY creation.
Step 2: Preparing the Wooden Frame
In the intricate process of fashioning your own solar panel, the second crucial step involves the meticulous preparation of the wooden frame, a foundational element that sets the stage for the entire structure.
How to Make Sure Choosing the Right Wood
Selecting the appropriate wood is the first decision in this step. Opt for wood that strikes a balance between durability and weight, considering the outdoor exposure your solar panel might endure. Plywood often proves to be an excellent choice due to its stability and resistance to the elements.
What Are The Dimension Guidelines
Precision is key in crafting an effective solar panel. Follow specific dimension guidelines to tailor the wooden frame to the size of your solar cells. Ensuring a snug fit is not only aesthetically pleasing but also enhances the overall efficiency of your solar panel.
How to Assemble the Frame
Once you’ve procured the right wood and adhered to dimension guidelines, the next phase involves the assembly of the wooden frame. Use an electric drill and bolts to securely join the pieces, creating a robust structure that can withstand various weather conditions.
How to Ensure Stability
Stability is paramount when it comes to the wooden frame. Double-check the connections, ensuring they are tight and secure. A stable frame guarantees that your solar cells remain in position, maximizing their exposure to sunlight and consequently optimizing energy absorption.
What Are The Aesthetics and Functionality
While functionality is the primary focus, a well-crafted wooden frame contributes to the overall aesthetics of your solar panel. A neatly assembled frame not only enhances the visual appeal but also reflects your dedication to precision and excellence.
How to Invest Time Properly
Preparing the wooden frame is a step that demands attention to detail and patience. Take the time to measure accurately, cut precisely, and assemble thoughtfully. This initial investment in time pays off in the form of a robust and enduring solar panel.
Step 3: Attaching Solar Cells
Creating a solar panel is an exciting venture, and Step 3 – Attaching Solar Cells – is where the magic truly begins. In this crucial phase, we delve into the intricate process of strategically placing and connecting the solar cells, turning your wooden frame into a functional energy-harvesting marvel.
Proper Spacing for Maximum Efficiency
One of the key considerations in this step is ensuring the solar cells are appropriately spaced. This isn’t just about aesthetics; it directly impacts the efficiency of your panel. We’ll explore the ideal distances between cells to maximize sunlight exposure and energy production.
Securing Solar Cells to the Wooden Frame
With spacing determined, the next task is securely attaching the solar cells to the wooden frame. This involves a careful balance – firm enough to withstand various weather conditions, yet flexible to accommodate potential expansion and contraction.
Wiring Connections: The Lifeblood of Your Panel
As we attach each solar cell, we simultaneously establish the crucial wiring connections. These connections are the lifeblood of your panel, facilitating the seamless flow of generated electricity. We’ll demystify the wiring process, ensuring a robust and effective network.
What Are The DIY Soldering Techniques
A skillful touch of soldering is required in this step to secure the wires and establish reliable connections between solar cells. We’ll walk you through the basics of DIY soldering, making it accessible even if you’re a novice in the world of electronics.
What Are The Durability and Longevity Tricks
Your solar panel isn’t just a one-time project – it’s an investment in sustainable energy. We’ll discuss protective measures to ensure the longevity of your solar cells, safeguarding them against the elements and extending the lifespan of your DIY creation.
How to Troubleshoot Common Issues
No DIY project is without its challenges, and solar panels are no exception. We’ll equip you with insights into common issues that may arise during the attachment process and guide you on troubleshooting techniques to keep your panel in optimal working condition.
How to Embrace the Satisfaction of Progress
As you progress through Step 3, take a moment to appreciate the tangible results of your efforts. Attaching solar cells marks a significant milestone, transforming your wooden frame into a canvas that captures the sun’s energy
Step 4: Connecting Wires
Wires, the unsung heroes of your solar panel, play a crucial role in ensuring the seamless transfer of energy. Choosing the right wire gauge is akin to selecting the right conductor for an orchestra – it determines the harmony and efficiency of the entire system.
Selecting the Right Wire Gauge
In this symphony of electrons, the thickness of your wires matters. Dive into the world of wire gauges, understanding how the right size ensures optimal conductivity. Too thin, and you risk resistance; too thick, and you’re dealing with unnecessary bulk.
Meticulous Soldering Techniques
Soldering, the delicate art of joining metals, takes center stage in this step. Unravel the secrets of creating strong, reliable connections between your solar cells. A well-soldered joint ensures the longevity and efficiency of your DIY power generator.
Establishing Crucial Connections
It’s not just about soldering; it’s about strategic wiring connections. Discover the intricate dance between positive and negative terminals, creating a series or parallel connection. Each choice influences the overall voltage and current output of your solar panel.
What is The Potential Challenges
Like any grand production, the “Connecting Wires” phase isn’t without its challenges. Explore common pitfalls, from faulty connections to the risk of electrical shorts. Learn how to troubleshoot effectively, ensuring your solar panel operates at peak performance.
Ensuring Safety in the Wiring Process
Safety is paramount in the world of DIY solar panels. Equip yourself with the knowledge of proper insulation techniques and secure wire management. The last thing you want is a dazzling solar panel marred by safety hazards.
Tips for Neat and Tidy Wiring
Aesthetics meet functionality in the realm of solar panel wiring. Discover tips for organizing and securing wires to maintain a clean and professional-looking setup. After all, a visually appealing solar panel is a testament to craftsmanship.
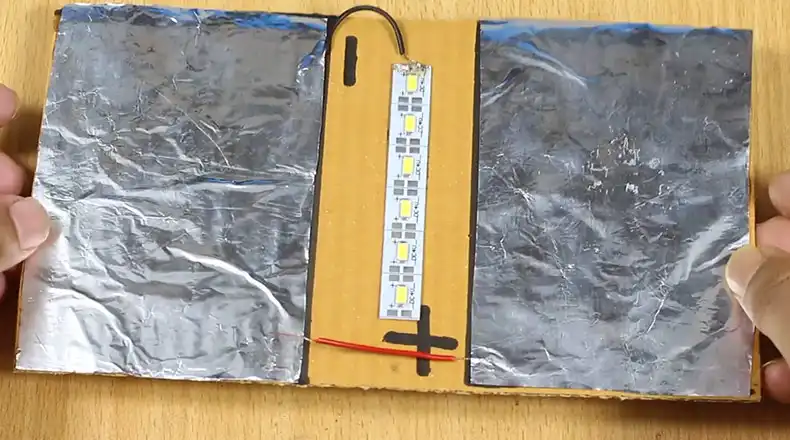
Step 5: Adding Aluminum Foil Backing
In the intricate process of crafting your solar panel, Step 5 plays a crucial role – adding aluminum foil backing. This step might seem simple, but its impact on the efficiency of your DIY solar panel is profound. Let’s delve into the details.
The Role of Aluminum Foil
Aluminum foil isn’t just for wrapping leftovers; it’s a star player in boosting your solar panel’s performance. Acting as a reflective surface, the foil enhances sunlight absorption, ensuring that every ray is harnessed for optimal energy production.
What Are The Materials You’ll Need
Before you start, gather the essentials: aluminum foil, scissors, and adhesive. Opt for a durable and high-quality foil to maximize its reflective properties. This step is all about precision and attention to detail.
Next Step Applying the Foil
With your solar panel structure ready, it’s time to carefully apply the aluminum foil. Lay the foil over the designated area, ensuring a smooth and secure fit. The foil should complement the dimensions of your panel, creating a seamless reflective surface.
Next Step Securing the Foil
To prevent any mishaps, secure the foil firmly in place. Adhesive or a gentle touch of tape can do the job. The goal is to create a surface that not only reflects sunlight effectively but also withstands environmental factors.
Next Step Maximizing Reflection
Take a moment to appreciate the science behind it – the foil reflects sunlight back onto the solar cells. This maximizes the absorption of sunlight, boosting the overall efficiency of your DIY solar panel. It’s a small step with a big impact.
What Are The Common Mistakes to Avoid
While adding aluminum foil backing is relatively straightforward, be mindful of common mistakes. Ensure there are no wrinkles or creases in the foil, as these can disrupt the reflective surface and compromise performance.
What Are The The Visual Impact
Visually, the addition of aluminum foil brings a polished and professional look to your solar panel. It’s not just about function; it’s about presenting a final product that exudes quality and attention to detail.
What is The The Green Touch
In the broader context of sustainability, the use of aluminum foil aligns with eco-friendly practices. By harnessing sunlight more efficiently, you’re contributing to a greener, more sustainable energy source.
Step 6: Sealing the Panel
When it comes to your DIY solar panel, the final touch is as crucial as every preceding step. Step 6 involves sealing the panel, a process that goes beyond mere aesthetics—it’s about safeguarding your creation against the elements and ensuring its longevity and optimal performance.
Why Seal the Panel?
Before delving into the “how,” let’s address the “why.” Sealing your solar panel is akin to giving it a protective shield against the unpredictable forces of nature.
Rain, humidity, and temperature fluctuations can wreak havoc on the internal components, potentially compromising functionality over time. A well-sealed panel not only fortifies against such threats but also enhances the overall durability of your DIY solar project.
Choosing the Right Sealant
The market offers a variety of sealants, but not all are created equal. Opt for a high-quality silicone caulk, renowned for its weather-resistant properties. This versatile sealant creates a robust barrier, preventing moisture from seeping into the panel’s delicate wiring and solar cells.
What Are The Application Process
Applying the sealant demands precision and care. On the inside of your cardboard box—housing the solar cells and wiring—use the silicone caulk to draw a zigzag pattern.
This ensures comprehensive coverage without overusing the sealant. Next, gently place the aluminum foil into the box, pressing it down firmly to allow the caulk to bond effectively. For optimal results, let the sealant dry overnight.
Benefits of a Well-Sealed Panel
A diligently sealed solar panel offers an array of benefits beyond protection. It contributes to the panel’s structural integrity, preventing potential sagging or warping due to moisture infiltration.
Additionally, the sealant acts as a thermal barrier, providing insulation that can prove invaluable in diverse weather conditions.
What Are The Long-Term Maintenance Process
Sealing your panel is not a one-time affair; it’s a commitment to long-term efficiency. Regularly inspect the sealant for signs of wear or damage. If you notice any issues, prompt resealing can save you from potential headaches down the solar-powered road.
Step 7: Installing Plexiglass Cover
As you embark on the penultimate step of your solar panel creation journey, the installation of the Plexiglass cover is a pivotal moment that ensures the longevity and efficiency of your DIY project.
Choosing the Right Plexiglass
Before diving into installation, let’s ensure you’ve selected the right Plexiglass. Opt for a sturdy yet lightweight option, considering factors like UV resistance to withstand prolonged sun exposure and thickness for added durability.
Securing Plexiglass to the Frame
Now, let’s get down to the nitty-gritty of the installation process. Gently lay the Plexiglass sheet over the frame, ensuring it aligns perfectly. Using appropriate screws or clips, secure the Plexiglass to the frame, ensuring a snug fit that prevents any unwanted wobbling or shifting.
Ensuring Durability and Transparency
The key here is balance. Tighten the screws adequately to ensure stability, but be cautious not to overtighten and risk cracking the Plexiglass. The goal is to create a weather-resistant barrier that allows sunlight to penetrate without compromising the structural integrity.
Sealing the Deal with Sealant
To fortify your solar panel against the forces of nature, apply a high-quality sealant around the edges of the Plexiglass. This not only enhances weatherproofing but also prevents moisture from sneaking into the inner workings of your DIY solar panel.
Tips for a Professional Finish
Achieve a polished and professional look by wiping away any excess sealant and ensuring that the Plexiglass sits flush with the frame. A clean finish not only enhances aesthetics but also contributes to the overall effectiveness of your solar panel.
The Transparent Advantage
The installation of the Plexiglass cover provides a transparent advantage to your solar panel. It acts as a barrier against rain, snow, and debris while allowing sunlight to nourish the solar cells within. This crucial step ensures that your DIY creation stands the test of time, consistently harnessing the power of the sun.
Step 8: Testing the Panel
Before you install your solar panel, it’s crucial to conduct thorough testing to confirm that all components are functioning as they should. This step not only helps you identify potential issues but also ensures the optimal performance of your DIY creation.
Setting Up Your Testing Environment
Find a sunny spot to set up your solar panel for testing. The more direct sunlight it receives, the better you can assess its power-generating capabilities. A clear day is ideal for accurate readings.
Using a Multimeter for Voltage Testing
Now, let’s get technical. Grab a multimeter, a tool that measures voltage, current, and resistance. Connect the multimeter to the wires of your solar panel to measure the voltage it produces. This step provides a real-time assessment of your panel’s power output.
Troubleshooting Common Issues
Testing is not just about celebrating success; it’s also about identifying and addressing potential challenges. If your multimeter readings are lower than expected or erratic, it’s time to troubleshoot. Check the wiring, ensure secure connections, and inspect the solar cells for any damage.
Ensuring Proper Sunlight Exposure
Sunlight is the fuel for your solar panel. During testing, observe the panel’s exposure to sunlight. If your panel is not positioned optimally, it might not generate the expected power. Adjust the angle or location as needed to maximize sunlight absorption.
How to Celebrate Success
Once your solar panel passes the testing phase with flying colors, it’s time to celebrate your achievement. You’ve successfully created a functional, DIY solar panel that can contribute to your energy needs in an eco-friendly way.
Real-World Application
Connect your panel to a small electronic device, like a light bulb or a fan, to see it in action. This real-world application not only validates the functionality of your solar panel but also showcases its potential to power everyday items.
Final Checks and Calibration
Before installing your solar panel permanently, conduct final checks. Ensure all connections are secure, and there are no loose components. If needed, calibrate the panel to maximize its efficiency.
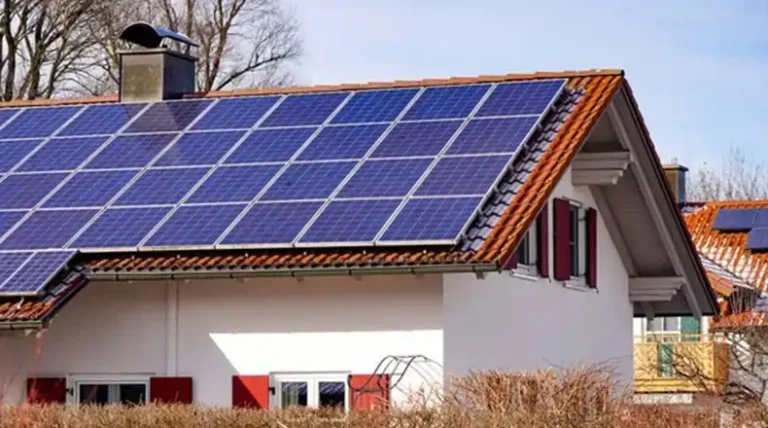
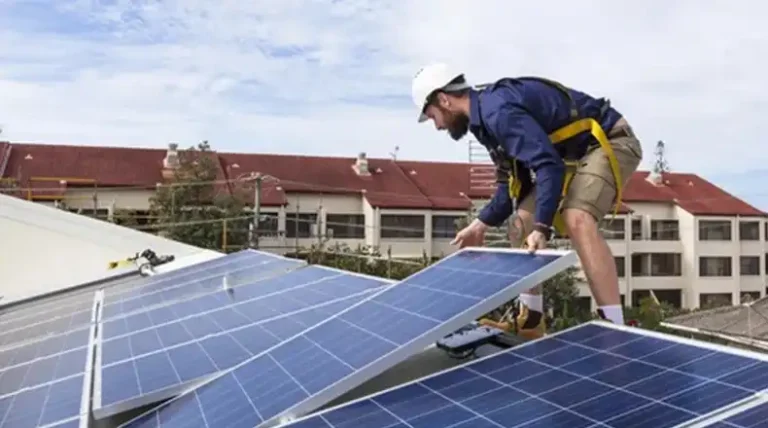
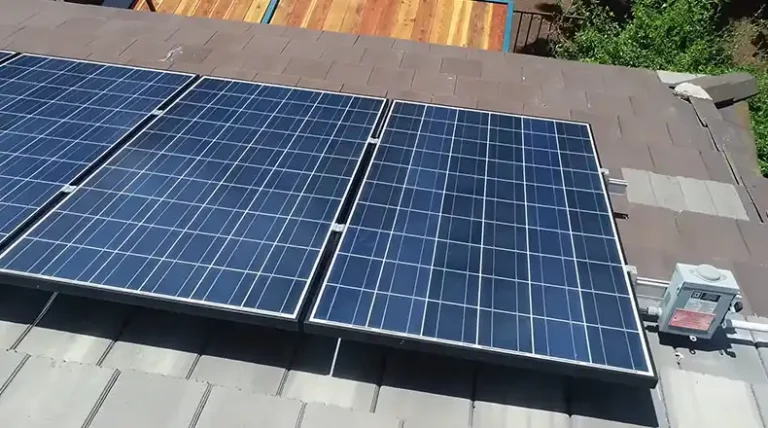
Step 9: Mounting the Solar Panel
Mounting your DIY solar panel is the crucial final step in bringing your renewable energy project to life. This process involves strategically placing and securing the panel for maximum sunlight exposure, ensuring optimal efficiency in energy generation.
Importance of Proper Mounting
Proper mounting is not just about aesthetics; it directly impacts the performance of your solar panel. The sun’s position varies throughout the day, and a well-mounted panel can harness more sunlight, translating into increased energy production.
Choosing the Right Location
Selecting the optimal location is paramount. A south-facing window is generally ideal for maximum sunlight exposure. Consider any potential obstructions like tall buildings or trees that might cast shadows on your panel, diminishing its effectiveness.
How to Secure the Panel
Once you’ve identified the perfect spot, securing your panel is the next critical step. Bolts and brackets come into play here, ensuring a stable and enduring attachment. The goal is to have a secure yet adjustable mount, allowing you to optimize the panel’s angle for different seasons.
Tips on Adjusting Panel Angle
Understanding how to adjust the panel angle is key to maximizing energy absorption. In winter, tilting the panel slightly more towards the sun can enhance efficiency, while a flatter angle in summer captures the sunlight more directly. This adaptability ensures year-round performance.
What Are The DIY Mounting Techniques
For the DIY enthusiast, crafting a custom mount adds a personal touch to the project. A wooden frame can be adapted with adjustable brackets, providing a cost-effective and efficient solution. Ensure the panel is firmly attached but also easily accessible for maintenance.
What Are The Testings After Mounting
After securing your solar panel, it’s essential to conduct a final test. Ensure that the panel is properly connected to the solar charge controller and that all wiring is secure. A successful test will confirm that your DIY solar panel is ready to harness the sun’s energy effectively.
Sunlight Exposure and Panel Efficiency
Remember, the effectiveness of your solar panel is directly linked to the amount of sunlight it receives. Regularly check and clean the panel surface to remove any dust or debris that might hinder sunlight absorption. A clean panel ensures optimal efficiency and longevity.
What Are The Environmental Considerations
In your quest for sustainable energy, also consider the environmental impact of your panel’s placement. Avoid disturbing local ecosystems, and if possible, opt for a location that minimizes disruption to wildlife.
You can make this! 1600 Watt Solar collector #1
What Are The Additional Enhancements
In the pursuit of a more sustainable and cost-effective energy solution, your DIY solar panel can go beyond the basics. Let’s explore some exciting enhancements that can elevate your solar endeavor to new heights.
1. Integrating a Solar Charge Controller
Take control of your solar panel’s charging process by introducing a solar charge controller. This smart addition regulates the voltage and current flowing to your battery, preventing overcharging and ensuring optimal battery life. Think of it as the guardian angel for your solar power storage.
2. Embracing Battery Storage Systems
Why stop at harnessing sunlight during the day? With a battery storage system, you can store excess energy generated by your solar panel for later use. This means powering your home even when the sun takes a break, providing a reliable and continuous energy source.
3. Upgrading for Increased Efficiency
Give your solar panel a performance boost by exploring efficiency upgrades. From high-efficiency solar cells to advanced tracking systems that follow the sun’s path, these upgrades can significantly enhance your panel’s overall output. It’s like giving your solar creation a turbocharged engine.
4. Implementing a Smart Monitoring System
Stay in the know about your solar panel’s performance with a smart monitoring system. These user-friendly tools provide real-time data on energy production, allowing you to track and optimize your solar panel’s efficiency. It’s like having a personal assistant for your renewable energy project.
5. Enhancing Aesthetics with Frame Design
Who said sustainability can’t be stylish? Consider upgrading your solar panel’s frame design for both functionality and aesthetics. Choose materials and shapes that complement your home’s architecture while maintaining structural integrity. It’s the perfect blend of form and function.
6. Exploring Dual-Axis Tracking Systems
For the ultimate in sun-chasing technology, consider incorporating a dual-axis tracking system. This innovation allows your solar panel to follow the sun’s movement both horizontally and vertically, maximizing exposure throughout the day. It’s like giving your solar panel a 360-degree view of the sun.
Related Questions
Q1: Can I install a DIY solar panel system without professional help?
A1: Yes, many DIY solar panel projects are designed to be user-friendly, with detailed guides available. However, if you’re unfamiliar with electrical work, it’s advisable to consult a professional to ensure safety and compliance with local regulations.
Q2: What are the essential tools and materials needed for a DIY solar panel?
A2: Key tools include a utility knife, electric drill, soldering equipment, and a multimeter. Materials typically include plywood, glass, aluminum, caulk, duct tape, and solar cells. Always refer to your specific project guide for a comprehensive list.
Q3: How much does it cost to build a DIY solar panel?
A3: The cost varies based on the size and materials used. On average, a small DIY solar panel project can range from $100 to $500. It’s a cost-effective solution compared to commercial installations, offering potential long-term savings on energy bills.
Q4: Can a DIY solar panel power an entire house?
A4: While a DIY solar panel can contribute to your energy needs, powering an entire house might require a larger and professionally installed system. DIY panels are suitable for smaller applications like charging devices, running small appliances, or supplementing energy usage.
Q5: Are there government incentives for DIY solar panel installations?
A5: Government incentives often apply to professionally installed solar systems. DIY projects may not qualify for these incentives, so it’s essential to research local regulations and incentives beforehand.
Q6: How much maintenance do DIY solar panels require?
A6: DIY solar panels are relatively low-maintenance. Regular cleaning to remove dirt and debris, checking for loose connections, and monitoring energy production are essential. Periodic inspections ensure optimal performance.
Q7: Can I connect multiple DIY solar panels for increased power output?
A7: Yes, you can connect multiple DIY solar panels to create a solar array. Proper wiring and configuration are crucial, and it’s recommended to use a charge controller to manage the flow of electricity and prevent overcharging.
Q8: What is the lifespan of a DIY solar panel?
A8: The lifespan of a DIY solar panel depends on the quality of materials and maintenance. On average, DIY panels can last 20-30 years. Regular checks and replacements of worn-out components can extend the panel’s life.
Q9: How do I store excess energy from my DIY solar panel?
A9: Storing excess energy can be done using a battery storage system. This allows you to use the generated power during periods of low sunlight or at night, providing a consistent energy source.
Q10: Can I take my DIY solar panel with me if I move?
A10: Yes, DIY solar panels are often portable. However, disassembling and reassembling the system requires careful handling to avoid damage. It’s recommended to consult with a professional when relocating your DIY solar panel.
Final Thoughts
In the realm of renewable energy, crafting your solar panel is a tangible and rewarding endeavor. As you embark on this journey, armed with aluminum foil and a wealth of knowledge, you’re not just creating a power source – you’re contributing to a sustainable and energy-efficient future.
So, roll up your sleeves, follow the steps, and bask in the glow of your DIY solar triumph. The sun’s energy is waiting to be harnessed by your ingenuity.