How to Hook Up and Use a 100 Watt Solar Panel
With rising electricity costs and concerns over fossil fuel usage, more people are looking to solar power as an eco-friendly and cost-effective alternative. A basic 100-watt solar panel kit is a great starting point for harnessing solar energy. However, proper installation is key to ensuring your system runs safely and efficiently. So, how do you hook up and use a 100-watt solar panel?
In short, successfully hooking up a 100W solar panel requires careful planning, gathering the necessary supplies, mounting the panels, connecting the components, and testing the system. While it may seem daunting if you’ve never done it before, taking it step-by-step will lead to an effective solar setup that can lower your electricity bills for years to come. This guide will walk you through the complete process of setting up a 100-watt solar panel system from start to finish. So, without any further ado, let’s get started below!
Planning for Hook Up and Use a 100-watt solar Panel
The first step is proper planning even before you purchase any equipment. You’ll need to measure your available roof space and layout to determine the number and size of solar panels your area can accommodate. South-facing roofs without shade are ideal for maximizing sunlight capture. Consider the panel wattage and voltage – most household systems use 12V or 24V panels.
It’s also important to check your local building codes for any permits required to install solar panels, especially if you live in a condo or other building with a homeowner’s association. Make sure to obtain these permits before starting installation.
You’ll also need a wiring plan to connect the solar panels through a charge controller to your batteries and inverter. Have a basic diagram to visualize how all the components will link together. Pre-installing any necessary wiring conduits makes hooking up the system much easier.
Here are some key steps to consider:
- Measure Roof Space: Determine the available area on your roof to accommodate the solar panel(s).
- Consider Panel Size and Number: Choose the appropriate panel size based on your energy needs and available space.
- Obtain Permits: Check with local authorities for any required permits or permissions.
- Create a Wiring Plan: Plan the wiring layout for connecting the panel(s), charge controller, and batteries.
- Gather Cable Conduits: Acquire cable conduits if necessary to protect wires from exposure to weather and potential damage.
Necessary Supplies
Once you’ve completed the planning stage, gather the supplies you’ll need. For a single 100W, 12V solar panel setup, you’ll need the following equipment:
- 100W solar panel
- Solar panel mounting equipment
- MC4 panel connectors
- 10 gauge solar wire
- 20A MPPT charge controller
- Battery disconnect switch
- 2 100Ah batteries
- 1500W power inverter
- Battery cables and terminal connectors
- DC breakers and fuses
- Other tools: drill, screwdriver, crimping tool, voltmeter
Having all your materials ready will make the installation process go smoothly.
Hooking Up a 100W Solar Panel
With planning and supplies ready, now it’s time to physically install your 100W solar system. Follow these steps:
Step 1: Preparing the Solar Panel
Inspect the Panel: Carefully examine the panel for any damage or defects.
Clean the Panel: Remove any dirt or debris from the panel’s surface to ensure optimal performance.
Identify Terminals: Locate the positive (+) and negative (-) terminals on the panel.
Secure the Connectors: Attach the MC4 connector cables to the back of the panel. Make sure the connectors snap securely in place.
Step 2: Mounting the Solar Panel
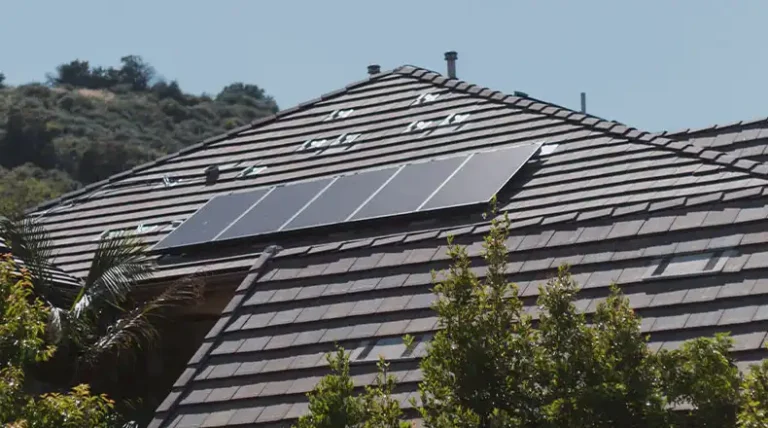
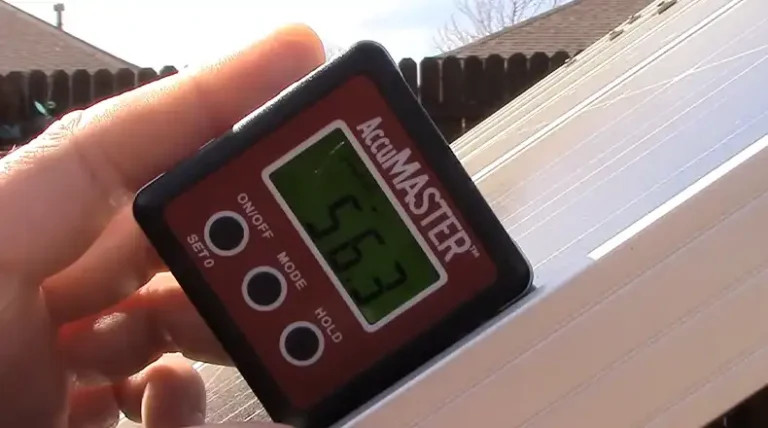
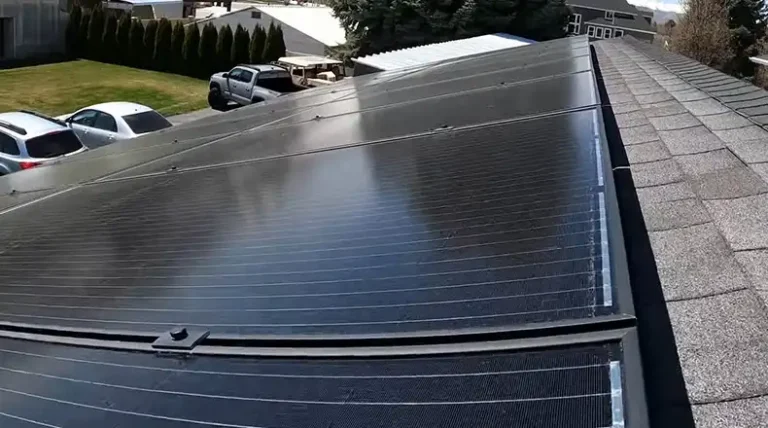
Choose a Mounting Location: Select a suitable location on the roof or other stable surface that receives direct sunlight. Position your panel facing due south at an angle equal to your latitude. For example, if you live at 35° north, tilt the panel 35° from horizontal.
Attach Mounting Brackets: Secure the mounting brackets to the chosen location using appropriate fasteners. Use your mounting equipment secured into roof rafters or lag bolts into concrete for ground mounts.
Mount the Solar Panel: Carefully lift the panel and securely attach it to the mounting brackets. The panel needs to be secure – wind uplift can damage components.
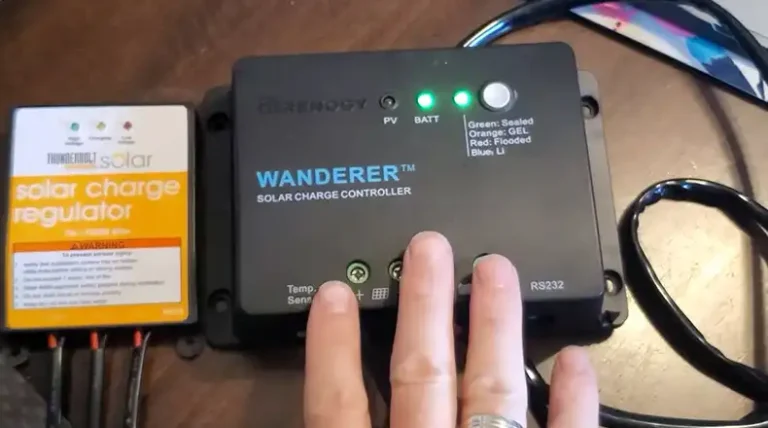
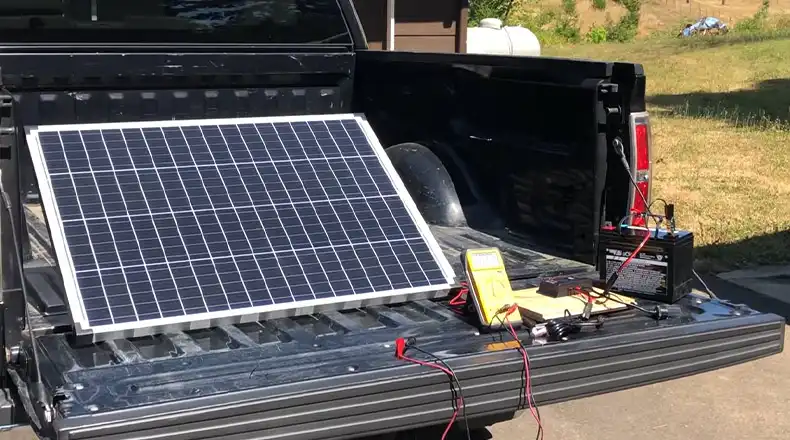
Step 3: Connecting the Solar Panel to the Charge Controller
Strip Wire Ends: Run your 10 gauge solar wires from the panel MC4 connectors to your charge controller. Strip a small section of insulation from the ends of the positive and negative wires.
Connect Wires to Terminal Block: Connect the positive wire to the positive terminal and the negative wire to the negative terminal on the terminal block.
Secure Wire Connections: Tighten the screws on the terminal block to firmly secure the wire connections. This allows the charge controller to take the power from the panel.
Step 4: Connecting the Charge Controller to the Battery (Optional)
Identify Battery Terminals: Locate the positive (+) and negative (-) terminals on the battery.
Connect Battery Wires: Use large gauge battery cables to connect your charge controller output to your batteries. Connect the positive wire from the charge controller to the positive terminal and the negative wire to the negative terminal on the battery.
Secure Battery Connections: Tighten the screws on the battery terminals to firmly secure the wire connections. This charges the batteries.
Step 5: Connecting the Charge Controller to the Inverter (Optional)
Identify Inverter Terminals: Locate the positive (+) and negative (-) terminals on the inverter.
Connect Inverter Wires: Connect the positive wire from the charge controller to the positive terminal and the negative wire to the negative terminal on the inverter.
Secure Inverter Connections: Tighten the screws on the inverter terminals to firmly secure the wire connections. Add fuses or breakers in the lines for safety. This converts the battery’s DC power into 120V AC electricity for household use when needed.
Step 6: Verifying Connections and Testing
Double-check all wiring connections to make sure the polarity is correct. Turn on the system and use a voltmeter to verify the solar panel is outputting around 18-20V. Measure the voltage at the batteries and power output from the inverter. Your system should now be up and running!
Safety and Maintenance
- Keep all wires and connections away from water sources. Use protective conduits if needed.
- Check wiring for signs of damage or fraying every 3-6 months.
- Inspect solar cells annually for defects or cracks which can reduce efficiency.
- Clear any dirt or debris off panels with a soft brush and mild cleaner.
- Check specific gravity of batteries with a hydrometer to ensure proper charge levels.
How to Hook Up Multiple 100 Watt Solar Panels
If you need more power, multiple 100W panels can be combined into a larger system. Just wire each panel through its own MC4 connectors into a combiner box. The combined power then runs through a larger gauge wire into the charge controller. Follow the same steps for connecting the controller to the batteries and inverter. Larger capacity equipment may be needed for multiple panels. Just take your time and wire each piece together one by one.
How to Disassemble a 100W Solar Panel
It’s not often needed, but disassembling a solar panel can be useful for maintenance or moving to a new location.
Step 1: Disconnect all wiring from the solar panel terminals and charge controller. Remove any conduit.
Step 2: Unscrew the screws or clamps securing the panel to its frame and carefully lift it free.
Step 3: Detach the MC4 connectors by pressing down their locking tabs and pulling them apart.
Step 4: Inspect all components and clean them as needed before reassembling them in the new location.
What Can You Power with 100-Watt Solar?
A 100-watt solar panel can power a variety of small electronics and devices, depending on their power consumption. Here are some examples of devices that can be powered by a 100-watt solar panel:
- Small laptops: Most laptops consume around 40-60 watts of power, so a 100-watt solar panel can provide enough power to run a laptop for several hours.
- Smartphone chargers: Smartphone chargers typically consume around 5-10 watts of power, so a 100-watt solar panel can charge multiple smartphones simultaneously.
- Tablet chargers: Tablet chargers consume around 10-20 watts of power, so a 100-watt solar panel can charge a tablet in a few hours.
- LED light bulbs: LED light bulbs are very energy efficient, and a 100-watt solar panel can power several LED light bulbs for several hours.
- Ceiling fans: Small ceiling fans typically consume around 30-50 watts of power, so a 100-watt solar panel can run a small ceiling fan for several hours.
- Wi-Fi routers: Wi-Fi routers typically consume around 5-10 watts of power, so a 100-watt solar panel can power a Wi-Fi router for several days.
In addition to these devices, a 100-watt solar panel can also be used to power a variety of other small appliances and gadgets, such as radios, flashlights, and power tools. The amount of time that a 100-watt solar panel can power a device will depend on the power consumption of the device and the amount of sunlight available.
Here is a table of the approximate power consumption of some common devices:
| Device | Power Consumption (Watts) |
| Small laptop | 40-60 |
| Smartphone charger | 5-10 |
| Tablet charger | 10-20 |
| LED light bulb | 10-15 |
| Ceiling fan | 30-50 |
| Wi-Fi router | 5-10 |
| Radio | 5-10 |
| Flashlight | 1-3 |
| Power tool | 100-200 |
As you can see, a 100-watt solar panel can power a variety of devices, making it a versatile and practical source of renewable energy for off-grid or emergency situations.
Conclusion
Installing a 100-watt solar panel system provides a viable means of harnessing the sun’s energy for electricity. By following proper installation steps, planning ahead, and taking safety precautions, a DIY solar panel setup can successfully reduce your power bills while benefitting the environment. While it takes some initial effort, you’ll gain energy independence and cost savings for years to come.
Frequently Asked Questions
How Many 12v Batteries Can A 100w Solar Panel Charge?
A 100W solar panel can generally charge 2-3 12V batteries in an appropriate series or parallel wiring configuration.
How Big Of A Power Inverter Do I Need For A 100-Watt Solar Panel?
For a 100W solar panel system, a power inverter in the range of 1000-1500 watts is typically sufficient for most basic household needs.
How Long Will It Take A 100w Solar Panel To Charge A Battery?
On average, a 100W solar panel takes 4-8 hours to fully charge a 100Ah 12V battery, but time varies based on sunlight intensity and battery capacity.
What Battery To Use With a 100-Watt Solar Panel?
Deep-cycle lead-acid batteries are the most common choice for solar storage. 12V 100Ah sealed batteries provide a good balance of capacity and price.
Can A 100w Solar Panel Charge A 100ah Battery?
Yes, a 100W solar panel can effectively charge a 100Ah 12V battery given proper sunlight exposure over the course of a day.