What Size Wire from Solar Charge Controller to Battery: Get to Know Everything
So you’ve decided to harness the power of the sun and embark on a solar energy adventure. Kudos to you for taking the leap into the world of clean, green energy! Whether you’re planning to power a small off-grid cabin or make your home more energy-efficient, one crucial piece of the puzzle is understanding what size wire to use from your solar charge controller to your battery.
This is why we’re here to help you by sharing comprehensive knowledge about this. We’ll break it down step by step and equip you with all the information you need to make the right choice. So, without any further ado, let’s begin!
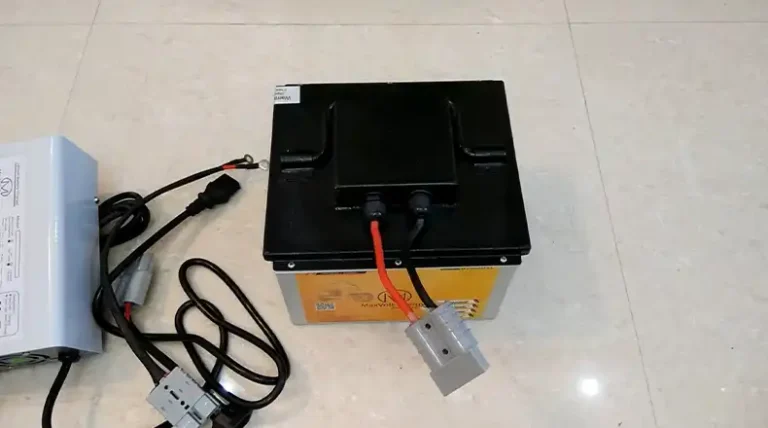
Connecting Your Solar Charge Controller to the Battery
Let’s start with the basics. Your solar charge controller acts as the gatekeeper of your solar power system. It regulates the flow of electricity from your solar panels to your battery, ensuring your battery doesn’t overcharge and get damaged. And how does it do that? With wires, of course! These wires are the conduits through which the sun’s energy travels from your panels to your battery, so getting the wire size right is crucial.
Wire Gauge and Its Importance
Wire Gauge 101: Wire gauge refers to the thickness or diameter of the wire. It’s typically measured in American Wire Gauge (AWG) or millimeters. In the context of connecting your solar charge controller to your battery, the wire gauge directly impacts how efficiently electricity flows and how much power is lost during transmission.
The larger the wire gauge number, the thinner the wire. Conversely, the smaller the gauge number, the thicker the wire. So, when it comes to choosing the right wire size, remember this golden rule: Thicker wires are better for transmitting power over longer distances with minimal energy loss.
Calculating the Right Wire Size
Alright, let’s get to the nitty-gritty of wire sizing. It’s not as complex as it might sound; you won’t need an advanced degree in electrical engineering for this. We can make it as simple as baking a pie (well, almost).
NOTE: To determine the minimum wire size required, you need to calculate the voltage drop. Voltage drop is the amount of voltage lost in the wire due to resistance. The longer the wire and the higher the current, the greater the voltage drop will be.
To calculate the voltage drop, you can use the following formula:
Voltage drop = (Current) * (Length of wire) / (Wire resistance)
The wire resistance is a property of the wire and is typically measured in ohms per foot. You can find the wire resistance in the manufacturer’s specifications for the wire.
Once you have calculated the voltage drop, you need to choose a wire size that will keep the voltage drop below 3%. This is important to ensure that the battery bank is properly charged.
Step 1: Determine the Current
First, you need to figure out how much current your solar panels will produce. Check the technical specifications or nameplate rating on your solar panels for this information. It’s usually measured in amperes (A) or milliamperes (mA).
Step 2: Check the Distance
Next, calculate the distance between your solar charge controller and the battery. The longer the distance, the thicker the wire you’ll need. Measure the distance in feet (ft) or meters (m) to keep things straightforward.
Step 3: Choose the Right Wire Size
Use a wire sizing chart to match your current and distance to the appropriate wire gauge. This chart is your trusty sidekick in the quest for the perfect wire size. It tells you which wire gauge is ideal for your specific situation. You want a wire size that can handle your current while minimizing energy loss during transmission.
The Woes of Using the Wrong Wire Size
Imagine that you’ve set up your solar system, and it’s a sunny day. You’re expecting those batteries to charge up, but you’re in for a nasty surprise. The wire you’ve used is too thin for the long distance between the solar charge controller and the battery. Energy is lost along the way, and your batteries are barely charging. What a bummer!
Using the wrong wire size can lead to –
- Energy Loss: Thinner wires have higher resistance, resulting in energy loss during transmission.
- Overheating: Inadequate wire size can cause the wires to heat up, leading to potential damage or even fire hazards.
- Reduced Efficiency: Thicker wires ensure efficient power transfer, allowing your batteries to charge up as expected.
Choosing the Correct Wire Size – Practical Examples
Let’s put theory into practice with a couple of real-world examples –
Scenario 1: Small Off-Grid Cabin
If you’re setting up a small off-grid cabin with a 12V solar panel system and your solar panels produce 20A of current, and the distance from your charge controller to the battery is 10 feet, you’d need a 10-gauge wire to keep things running efficiently.
Scenario 2: Residential Solar Installation
For a larger residential solar installation with a 48V system producing 60A of current and a distance of 50 feet between the charge controller and battery, you’d want to go with a beefier 2-gauge wire to ensure minimal energy loss.
People Also Ask
What happens if I use a wire that’s too small for the distance between the charge controller and the battery?
When the wire is too small for the distance, you’ll experience significant energy loss due to the high resistance of the wire. This can lead to inefficient charging and potential overheating of the wire.
Is it better to choose a wire size that’s slightly larger than needed to be safe?
While it’s essential to choose an appropriate wire size, going slightly larger can reduce energy loss and future-proof your system. However, overly large wires can be costly and impractical, so strike a balance.
How does temperature affect wire size selection?
Temperature can impact wire performance. In colder climates, you may need slightly larger wires to compensate for increased resistance in low temperatures. Conversely, hotter climates may allow for slightly smaller wire sizes.
Can I use extension cords as wiring for my solar charge controller to the battery?
It’s not recommended to use standard extension cords, as they are not designed for the constant flow of electricity required in solar systems. Instead, use wires rated for solar applications to ensure safety and efficiency.
Do I need to consult an electrician for wire sizing, or can I do it myself?
While basic wire sizing can be done by individuals with some electrical knowledge, it’s advisable to consult an electrician for larger or more complex solar installations to ensure safety and compliance with local electrical codes.
In Conclusion
Choosing the right wire size from your solar charge controller to the battery is a pivotal step in ensuring the efficiency and safety of your solar power system. Remember, the thicker the wire, the better it can handle the current and the longer the distance without losing energy. It’s all about finding that sweet spot. So, measure twice, consult wire sizing charts, and set up your system with confidence.
We hope this article has shed light on this often-overlooked aspect of solar installations. If you have any more questions or need further guidance, feel free to ask in the comments section below. We’re here to assist you on your solar journey. Thanks for reading, and may your solar adventures be sunny and successful!