Solar Panel Stand Design (My Full Guideline)
Installing solar panels can be a significant investment, so having a properly designed solar panel stand is crucial to protect that investment and optimize solar production. With the right solar panel stand design, you can reduce the risk of damage, adjust for seasonal changes in sun angle, and boost your solar energy output.
Designing a solar panel stand that can withstand years of exposure to sun, wind, rain, and snow can be an engineering challenge. By taking the time to assess your unique needs and environment, you can create custom solar panel stands that will reliably support your system at peak performance for decades.
In this article, I will explore the key considerations for solar panel stand design, the different types of stands available, material options, and tips for maximizing solar efficiency. Let’s get started!
Things to Consider Before Designing a Solar Panel Stand
When designing solar panel stands, the following factors should be evaluated:
Location and Site Analysis
The location and specific site conditions will dictate what type of solar panel stand design is required:
Sun Exposure – Seek to maximize direct sunlight during peak daylight hours. Nearby obstructions like trees or buildings can result in partial shade that reduces output.
Land Space – Ensure there is adequate area for the desired number and layout of solar panels. Adhere to property line setbacks.
Slope/Terrain – A flat or gently sloping, south-facing site is ideal for fixed tilt stands. Use tracking mounts for uneven terrain.
Structural Needs
The stand must be designed to handle all expected structural forces and loads:
Material Strength & Durability – Withstand years of exposure to sun, wind, rain/snow, storms, debris, animals, vandalism, etc.
Anchor Design – Securely anchor stands in the ground while still allowing some seasonal angle adjustability.
Adjustability – Allow for manual seasonal tilt adjustments for optimal sun exposure angles.
Solar Panel Specifications
Design the mounts customized to your specific solar panel model:
Panel Dimensions & Weight – The stand must accommodate the panel shape and support the distributed weight.
Mounting Mechanism – Attach to the panel frame at optimal structural support points.
Wiring Considerations – Enable accessible, neat wiring runs without damage risk.
Applicable Codes and Standards
Ensure solar panel stands adhere to all required codes and standards:
Structural, Electrical, Fire, etc – Meet state and local requirements.
Permitting & Inspections – Have a licensed engineer sign off on designs.
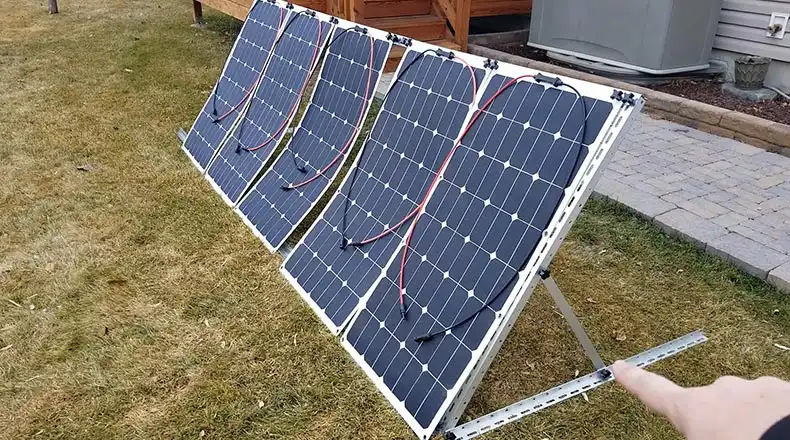
Types of Solar Panel Stands
The choice of solar panel stand depends on several factors, including the location, installation type, and desired functionality. There are 5 common types of solar panel stand systems. Here’s an overview of common stand designs:
- Ground Mount
Ground mounts are the most versatile and widely used type of solar panel stand. They consist of poles or posts fixed directly into the ground, providing a sturdy foundation for solar panels. Ground mounts are suitable for both residential and commercial installations on open land.
- Pole Mount
Pole mounts are a variation of ground mounts, utilizing a single pole anchored in the ground to support the solar panels. This design is particularly well-suited for installations in areas with limited space or where ground disturbances are undesirable.
- Tilt Mount
Tilt mounts introduce an angled design to the solar panel stand, allowing for precise adjustment of the tilt angle to maximize sunlight capture throughout the year. Tilt mounts are commonly used in fixed-axis tracking systems, where the panels are adjusted manually or seasonally.
- Tracking Mount
Tracking mounts represent the most advanced type of solar panel stand, incorporating motorized systems that automatically track the sun’s movement across the sky. Single-axis trackers follow the sun’s east-west movement, while dual-axis trackers also adjust for the sun’s altitude changes.
- Roof Mount
Roof mounts are designed for rooftop installations, utilizing brackets or rails secured to the roof structure. Roof mounts are space-efficient and aesthetically pleasing, making them a popular choice for residential and commercial buildings.
Material Options for Solar Panel Stands
The choice of material for solar panel stands is crucial for both performance and longevity. Common solar panel stand and mount materials include:
- Wood
Wood offers a natural, aesthetically pleasing, and low-cost option for solar panel stands. Cedar and redwood are particularly well-suited due to their natural resistance to rot and decay. However, untreated pine is susceptible to rot and insect damage, requiring additional treatment or protection.
- Metal
Metal materials, such as galvanized steel or aluminum, provide superior strength and durability compared to wood. Galvanized steel is particularly resistant to corrosion, making it ideal for outdoor installations. Aluminum offers lightweight and corrosion-resistant properties, but it can conduct heat, which may require additional considerations in hot climates.
- Concrete
Concrete stands offer exceptional durability and can withstand extreme weather conditions. However, their significant weight can make them more challenging to install and transport. Additionally, post footings may be required to provide a stable foundation for concrete stands.
Tips to Design Solar Panel Stands for Maximum Efficiency
Follow these best practices when designing solar panel stands:
A. Allow for Seasonal Angle Adjustments
Manually adjustable tilt angle settings by season maximize year-round energy production as the sun’s path across the sky shifts.
B. Select Corrosion-Resistant Materials
Use galvanized, stainless, or aluminum components to withstand decades of sun, moisture, and soil contact without deterioration or seizing up.
C. Optimize Strength While Minimizing Materials
Efficient structural aluminum components and concrete anchoring often outperform wood and steel by mass. Reduce needless use of excess materials driving up costs.
D. Enable Easy Solar Panel Access
Elevating solar panels on poles or tilted legs makes inspection, cleaning, and maintenance much simpler over decades of service.
E. Integrate Wind Bracing
In windy locations, diagonal bracing and concrete ballasting may be needed so wind uplift forces do not damage the structural integrity.
F. Use Quality Components
Higher-grade construction-level mounting hardware, poles, and mechanical components outlast consumer/residential grades, saving replacement costs.
Weight Bearing Capacity of Solar Panels
Solar panel’s self-weight is typically:
- 4 psf for crystalline silicon panels
- 2 to 3 psf for thin-film panels
Solar panel racking systems should be designed to withstand:
- 3 times solar panel weight for wind loads
- 5 times solar panel weight for snow loads
Consult local structural code requirements as well to establish suitable structural safety factors.
Comparison of DIY and Commercial Solar Panel Stands
Here is a comparison table contrasting DIY and commercial solar panel stands:
| Feature | DIY Solar Panel Stands | Commercial Solar Panel Stands |
| Materials | Typically wood, sometimes metal | Engineered metal or concrete |
| Durability | Prone to weathering, rotting, decay | Withstand decades of harsh conditions |
| Design Expertise | No engineering, rule-of-thumb construction | Designed by structural engineers |
| Quality Testing | None, unproven | Stringent component testing |
| Permitting | Typically not permitted | Engineer stamped drawings |
| Initial Cost | Very low materials cost | High, but costs recouped over a lifetime |
| Maintenance | Frequent checks and repairs needed | Little required for decades |
| Lifespan | 15-25 years typically | 30-50+ years expected |
| Efficiency Boost | Minimal solar optimization | Ideal angles for maximum solar gain |
| Resale Value | Actually reduces the home value | Solar array condition protects the value |
DIY stands save money upfront but often cost more in the long run when factoring in maintenance, replacements, and lost solar production. Commercial stands pay for themselves over time while protecting the system investment and producing the maximum solar kilowatt-hours.
How to Make a DIY Solar Panel Stand
If you have the necessary carpentry or metalworking skills and are comfortable with DIY projects, building a solar panel stand can be a rewarding experience. Here’s a general guide on how to construct a DIY ground-mounted solar panel stand:
Materials:
- Lumber (wood or metal)
- Concrete or metal posts
- Bolts, screws, and anchors
- Saw, drill, and other tools
- Level and measuring tape
Steps:
- Plan and Design: Determine the number of solar panels you want to install and the desired tilt angle for your location. Sketch out a design for the stand, ensuring it can accommodate the weight of the panels and withstand local weather conditions.
- Cut and Assemble the Frame: Cut the lumber or metal pieces according to your design. Assemble the frame using bolts, screws, and braces. Ensure the frame is square and level.
- Prepare the Ground: Dig holes for the concrete or metal posts, ensuring they are deep enough to provide a firm foundation. Set the posts in the holes and pour concrete or secure them with anchors.
- Attach the Frame to the Posts: Secure the frame to the posts using bolts or screws. Ensure the frame is level and aligned with your planned tilt angle.
- Install the Solar Panels: Mount the solar panels onto the frame using the appropriate mounting hardware. Follow the manufacturer’s instructions for proper installation and spacing.
- Connect the Wiring: Run the electrical wiring from the solar panels to the inverter or battery bank. Follow electrical safety guidelines and ensure all connections are secure and weatherproof.
- Grounding: Connect the stand to a grounding rod to protect the system from lightning strikes and electrical faults.
Conclusion
Designing proper solar panel stands, requires careful consideration of site conditions, structural loads, materials selection, and solar efficiency factors. With attention to detail in the design stage and quality construction, homeowners and solar developers can have confidence their investments will stand the test of time and elements while optimizing solar production for decades to come. If there are any questions about designing the optimal solar panel stands, please leave them in the comments section below!
FAQs with Answers
Q: What Is The Optimal Solar Panel Tilt Angle?
A: Generally solar panel tilt angles equal to your latitude are optimal, angled due south, allowing seasonal manual angle adjustments of +/- 15 degrees to boost overall annual solar output.
Q: What Height Should Solar Panel Stands Be?
A: Ground clearance should be at least 18 inches above the maximum expected snow depth. Panels are typically 6-8 feet above ground for accessible wiring and maintenance.
Q: Can You Adjust The Solar Panel Angle By Season?
A: Yes, tiltable pole-mount and ground-mount systems allow for manual seasonal tilt angle adjustments to follow the sun’s shifting path across the sky for maximum solar energy production.
Q: How Do I Fasten Solar Panels To Metal Frame?
A: Self-tapping stainless steel bolts with neoprene isolation washers between the panel frame and mounting rails securely fasten panels while allowing thermal expansion/contraction. Torque bolts to panel manufacturer specs.