Convert Light Fixture to Solar Powered (All You Need to Know)
Many homeowners are looking for ways to make their homes more eco-friendly and reduce their carbon footprint. One way to accomplish this is by converting traditional light fixtures to solar-powered fixtures. But is it possible to transform a standard light fixture to run on solar energy? The short answer is yes, with a bit of handiwork, it can be done. Converting to solar lights can help lower your electricity bills, make your home more sustainable, and provide lighting during power outages. Read on to learn the complete procedure for converting a light to solar power.
Is It Possible to Transform a Light Fixture to a Solar Light Fixture?
Transforming a wired light fixture to run on solar power is absolutely possible with the right materials and some basic electrical know-how. The key steps involve removing the existing wired fixture, installing a solar panel kit, connecting everything to a solar-compatible light fixture, and mounting it where the sun’s rays can reach the solar panel.
It does require careful working with electrical wiring, so some homeowners choose to hire an electrician to ensure proper installation and safety. But for those comfortable working with household wiring, a solar light conversion project can be a fun, money-saving DIY endeavor. The rest of this article provides step-by-step instructions to convert most standard light fixtures to solar.
What’s the Procedure Then?
Converting an existing light fixture requires carefully removing it, acquiring a few key items, and then safely re-installing the new solar-powered light. The complete procedure includes:
Materials and Equipment
- Solar light fixture kit (with panel, battery pack, and wires)
- Hand tools (screwdriver, wrenches, pliers, wire strippers)
- Electrical tape
- Voltmeter (to test wires)
Steps Required for the Conversion
Step 1 – Disconnect power and remove the old light fixture:
Turn off the breaker/fuse supplying power to the existing light. Use a voltmeter to double-check wires have no power before touching them. Then disconnect the wires and unmount the old fixture.
Step 2 – Install solar panel bracket outdoors:
Choose a spot receiving 6-8 hours of direct sun—south-facing roofs/walls are best. Mount the solar panel bracket there according to the included directions.
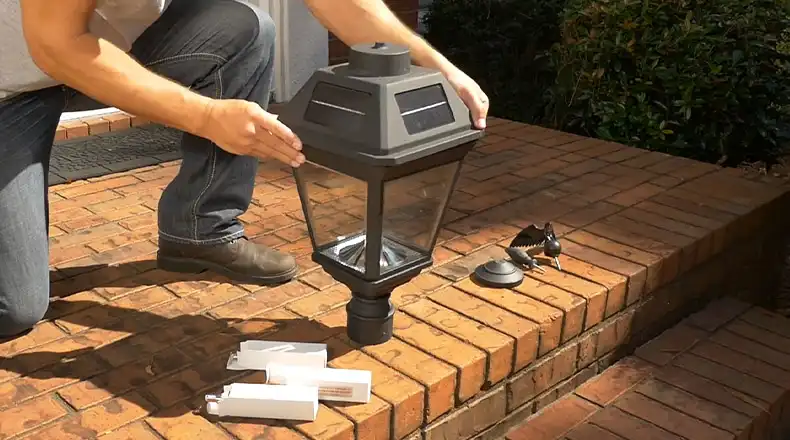
Step 3 – Mount new solar light fixture:
Hold the fixture to the desired spot on the wall/ceiling and mark holes. Drill holes if needed and mount the light, leaving screws a bit loose for now.
Step 4 – Connect wiring to solar components:
Run the solar panel cable to the light fixture location and connect wires according to the diagram supplied with the kit. Ensure secure connections.
Step 5 – Test operation and mount everything permanently:
Turn on the breaker to enable solar charging. Let the battery charge completely then turn light’s switch on to verify operation. Tighten all mountings so components are securely installed.
Follow the solar kit’s instructions closely, get the angle of the solar panel right to maximize sun exposure, and take time making clean wiring connections. With care taken during installation, the converted solar light should work beautifully!
What are the Benefits and Drawbacks of Doing So?
Converting an existing wired fixture to solar offers several excellent perks. But there are a few potential downsides to consider too.
Benefits
Saves on electricity bills: Solar lights get free daytime power from the sun rather than demand energy from the electrical grid to operate. This saves money month after month.
Provides light during outages: Since solar systems generate and store their energy, they offer illumination even if there’s a blackout or downed power lines in the area.
More sustainability: Solar lights reduce reliance on fossil fuels to generate electrical power for a home. This saves resources and cuts carbon emissions over time.
Increased home value: Eco-upgrades like solar lights boost resale value. Homebuyers are willing to pay more for sustainable, lower-utility-cost housing.
Drawbacks
Higher upfront cost: Although solar lights pay for themselves over years of use, purchasing all the solar components costs more initially versus basic wired fixtures.
Installation challenges: Handling electrical wiring carries safety risks if solar components aren’t installed correctly. Hiring an electrician is the safest route for many.
Intermittent light issues: Solar lights rely on sunny days for charging. Overcast stretches may lead to dimmer illumination at night. Panel positioning minimizes this issue.
Aesthetic compromise: Panels and some solar light designs may not fit every home’s architectural style. Appearance is secondary to function but still a consideration.
With proper planning and component selection, the disadvantages are manageable compared to the many perks. And even visually, solar designs are improving constantly. There are solutions available to suit almost any home now.
Is Convert Light Fixture to Solar Powered Worthy?
For most households, converting eligible existing light fixtures over to solar power is a smart upgrade—both environmentally and financially. The eco-friendly benefits alone make the changeover worthwhile for many. Plus, improving property value and saving substantially on electricity expenses over solar lights’ 20+ year lifespan adds up.
With some handy skills and the right solar components, transforming standard fixtures is an achievable DIY home project. And even if hiring an electrician to ensure safe installation, the long-term savings still make solar lights a sound investment. Heed the few cautions above, properly position the solar panel for maximum light exposure, and enjoy free off-grid illumination for decades to come!
How many hours per day should my solar light panel get sun?
For optimal solar charging and brightness through the night, install solar panels at an angle facing true south if possible. This enables 6-8 full hours of direct sunlight during the day. Even as little as 4 hours can work but may result in dimmer light output.
Can any wired light fixture be converted to solar?
Nearly all basic ceiling-mount and wall-mounted fixtures can switch to solar with the right components and proper wiring modifications. Just be sure to match voltage and wattage to panel size during parts selection. More complex or custom-wired fixtures may pose compatibility issues.
Is special wiring required for solar light installations?
Standard 12-14 gauge outdoor-rated wire that matches the solar system’s voltage (typically 12V or 24V) works fine. Using connectors suited for damp locations is also a smart precaution to avoid shorts. No special solar cable is mandatory, just properly sized basic electrical wire.
How long do solar light batteries last?
Similar to car batteries, solar light system batteries gradually lose storage capacity and need replacement every 2-4 years depending on usage intensity. High-quality lithium-ion batteries can last over 5 years. Avoiding full discharges and extreme temps extends overall battery lifespan.
Can solar lights get wet from rain or snow?
Yes—top-tier solar fixtures are designed to withstand outdoor exposure. Their internal components resist moisture and temperature swings. Solar panels themselves require sunlight access to function but are also rain/snow-proof if tilted for adequate drainage. Ensure proper overhang clearance so snow buildup doesn’t block solar panel sun access.
Converting existing light fixtures to solar power brings excellent eco-friendly and cost-saving benefits to any home. Weigh the project planning and equipment considerations covered here, acquire the necessary solar components for your needs, and start saving both energy and money for years to come! Feel free to leave a comment below if you have any additional questions. And thanks for reading!