How to Remove Protective Film from Solar Lights? Easier Than You Think
Solar lights are a great way to add light to your outdoor space without having to worry about wiring or electricity. They’re also environmentally friendly and can save you money on your energy bills.
However, before you start using your solar lights, you’ll need to remove the protective film that covers the solar panels. This film is designed to protect the panels during shipping and handling, but it can also reduce the efficiency of the panels and prevent them from charging properly.
In this article, we’ll show you how to remove the protective film from your solar lights quickly and easily. We’ll also provide some additional tips for removing the film and ensuring that your solar lights operate properly.
What to Do to Remove Protective Film from Solar Lights
Removing the protective film from your solar lights is not rocket science, but it does require some finesse. Here’s a step-by-step guide to help you get the job done right:
- Step 1 – Wash your hands thoroughly with soap and water. This will help to prevent fingerprints and smudges from getting on the solar panels.
- Step 2 – Find a well-lit area where you can work. This will help you to see the edges of the film more easily.
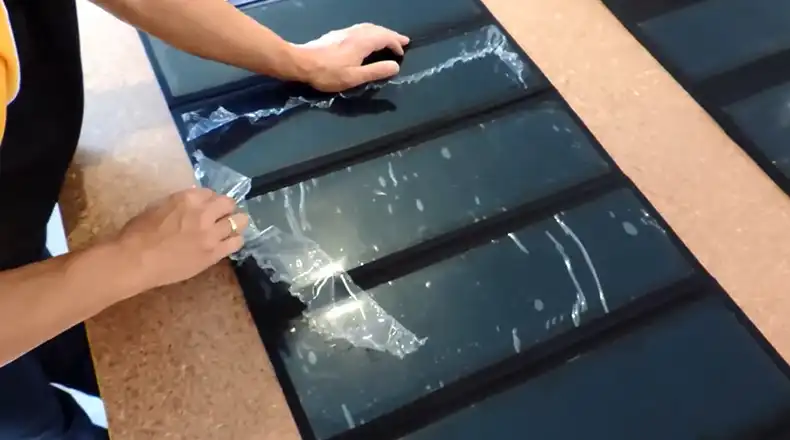
- Step 3 – Locate the edge of the protective film on one corner of the solar panel. Use your fingernail or a thin object to gently lift the edge of the film.
- Step 4 – Once you have lifted the edge of the film, slowly peel it back from the solar panel. Be careful not to tear the film.
- Step 5 – Once the film is removed, inspect the solar panel for any fingerprints or smudges. If you see any, wipe them away with a clean, soft cloth.
Additional Tips for Removing Protective Film Operation
Here are some additional tips to ensure the protective film removal process goes off without a hitch:
a. Use a piece of tape to help you lift the edge of the film.
This is a helpful tip if you are having trouble lifting the edge of the film with your fingernail or other object. The tape will give you a better grip on the film and make it less likely to tear.
b. Use a hair dryer on a low setting to heat the film. This will make it easier to peel off.
The heat from the hair dryer will make the film more pliable and easier to remove. Be careful not to overheat the film, as this could damage it.
c. Be careful not to scratch the solar panels with your fingernail or other object.
The solar panels are delicate and can be easily scratched. Be careful when removing the film to avoid scratching the panels.
If you’re having trouble removing all of the film, you can use a mild soap and water solution to help loosen it.
The soap and water solution will help to loosen the adhesive on the film and make it easier to remove. Be careful not to get too much water on the solar panels, as this could damage them.
Bonus Tips – Is It Mandatory to Remove the Protective Film?
Now, you might be wondering, “Is it really necessary to remove the protective film?” Well, the short answer is yes. The protective film is there to, well, protect the solar panel during transportation and installation. However, it’s not designed to stay on indefinitely. Leaving the film in place can decrease the efficiency of your solar lights. It’s like wearing sunglasses indoors; they might look cool, but they’re not doing what they’re meant to do. So, take off that film, and let your solar lights shine!
Final Thoughts
Removing the protective film from your solar lights is a small task that can make a big difference in their performance. With a little bit of care and attention, you can ensure that your solar lights are operating at their full potential, illuminating your outdoor spaces efficiently and beautifully. So, don’t let that film hold back your garden’s glow – get to peeling, and let there be light!