How Can I Connect 8 Solar Panels of 300 Watts with A 4 Battery System?
Deploying solar power for your home, cabin, or office starts with properly designing and installing the photovoltaic system components for maximum efficiency. Connecting multiple solar panels to meet your electricity demands along with batteries for energy storage requires careful capacity planning and component sizing. If you’re wondering how to wire the common configuration of 8 x 300-watt solar panels with a matched 4-battery bank, this guide has you covered.
We’ll walk through the key considerations, calculations, equipment selection pointers, and wiring steps that professionals use for constructing a robust 2.4KW PV system. Whether you’re installing grid-tied panels or building an off-grid solar array with battery backup, our advice will set you on the path to solar success.
Factors to Consider for Connecting 8X300 Solar Panels with a 4-Battery System
First of all, connecting the entire system is very crucial because if you fail to do so, then you may damage the battery and other components. Or the output won’t be satisfactory. However, there are a few factors to consider to ensure the system is safe and efficient.
Voltage Matching:
The voltage of the solar panels should match the voltage of the battery bank. In this case, the total voltage of the 8 x 300W panels will be around 400V (assuming an open circuit voltage of 50V per panel). Therefore, you will need a 48V battery bank to connect the panels safely.
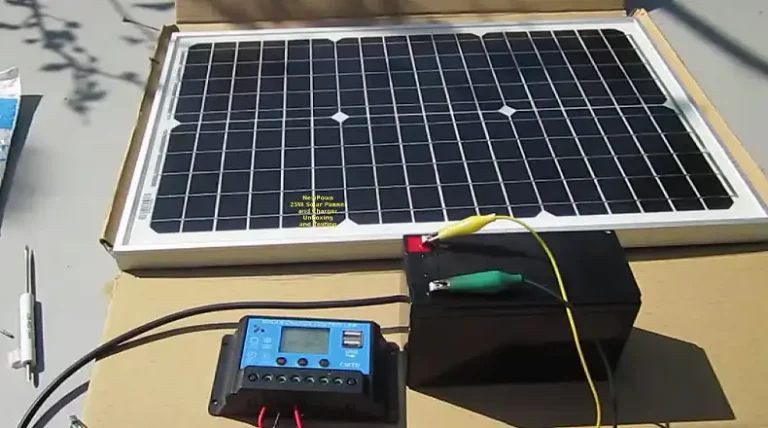
Charge Controller:
A charge controller is essential to regulate the flow of energy between the solar panels and the battery bank. It prevents overcharging and over-discharging of the batteries, protecting them from damage. Choose a charge controller with a maximum current rating that can handle the total current output of the solar panels.
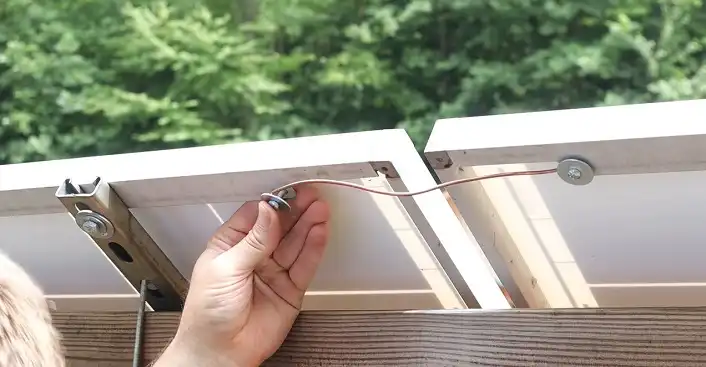
Wiring and Connections:
Proper wiring and connections are crucial for a safe and efficient system. Use MC4 connectors, which are designed specifically for solar panels, to connect the panels in series or parallel to achieve the desired voltage and current output. Ensure all connections are tight and secure to prevent voltage drops and potential safety hazards.
Battery Capacity:
The capacity of the battery bank should be sufficient to meet your energy needs during periods of low or no sunlight. Consider your typical daily energy consumption and select a battery bank with a storage capacity that can provide enough power to cover those needs.
Consulting a Professional:
If you are unsure about the technical aspects of connecting 8 x 300W panels with a 4-battery system, it is advisable to consult a qualified electrician or solar installer. They can assess your specific requirements and help you design a safe and efficient system that meets your energy needs.
Steps for Connecting 8 X 300W Solar Panels with a 4 Battery System
Connecting 8 solar panels of 300 watts with a 4-battery system involves carefully configuring the panels and wiring to ensure compatibility and efficient energy transfer. Here’s a step-by-step guide:
Step 1: Determine System Voltage
The first step is to determine the nominal voltage of the 4-battery system. This information is crucial as it dictates the voltage configuration of the solar panels. The nominal voltage is typically specified on the battery specifications or user manual. For instance, if the battery system has a nominal voltage of 48 volts, the solar panels should also be configured to output a nominal voltage of 48 volts.
Step 2: Check Panel Specifications
Before proceeding with the wiring, it is essential to gather the open-circuit voltage (Voc) and short-circuit current (Isc) ratings of each 300-watt solar panel. These specifications are normally found on the panel’s data sheet or label. The Voc represents the maximum voltage a panel can produce under ideal conditions, while the Isc represents the maximum current it can generate under full sunlight. These values will play a role in determining the wiring configuration.
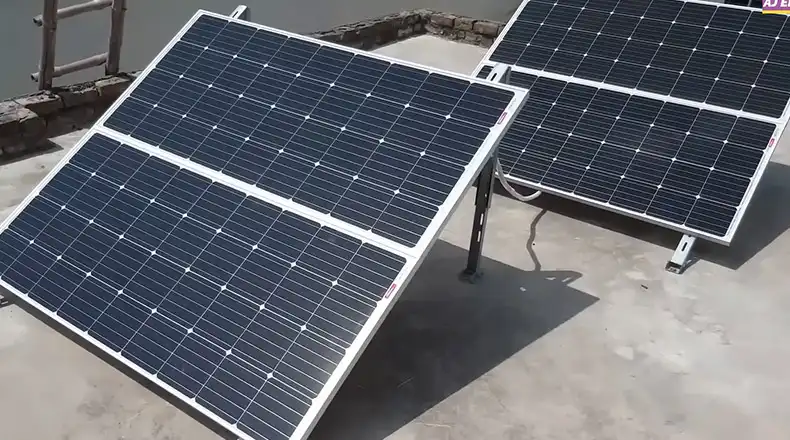
Step 3: Configure Panel Wiring
The wiring configuration of the solar panels depends on the desired voltage and current output. There are three main approaches: series connection, parallel connection, and a combination of both.
Series Connection:
In a series connection, the positive terminal of one panel is connected to the negative terminal of the next panel, forming a chain. This arrangement increases the total voltage output but reduces the current output. To calculate the total voltage, add up the Voc of each panel. To determine the total current, use Isc of the panel with the lowest current output. Using the series connection helps you to transfer solar energy over a long distance without any significant loss. But if one panel is shaded, the efficiency or outcome of the entire system will decrease.
Parallel Connection:
In a parallel connection, all positive terminals are linked together, and all negative terminals are connected together. This configuration increases the total current output but reduces the voltage output. To calculate the total voltage, use the Voc of any one panel. However, if you are willing to run the system for the long run then parallel won’t be the ideal choice as you will have more system loss.
Combined Series and Parallel Connection:
For specific requirements, a combination of series and parallel connections may be necessary. This allows for fine-tuning the voltage and current output to match the desired specifications.
Step 4: Match Panel Output to Battery Voltage
The total voltage output of the connected solar panels should closely match the nominal voltage of the battery system. This ensures that the panels can properly charge the batteries and maximize efficiency. If the panel output voltage is too high, the charge controller will need to dissipate the excess voltage, which can reduce efficiency. Conversely, if the panel output voltage is too low, the batteries may not charge fully.
Step 5: Choose a Charge Controller
Choose a charge controller to regulate the charging process and prevent battery damage. Two main types are available: Pulse Width Modulation (PWM) and Maximum Power Point Tracking (MPPT). PWM controllers are simpler and less expensive but less efficient. MPPT controllers are more advanced and efficient but more costly. MPPT controllers are generally recommended due to their superior efficiency. However, PWM controllers may be suitable for smaller systems or budget-conscious applications.
To properly size the solar charge controller, you take the total watts of the solar array (2,400W) and divide it by the connected battery bank voltage (24V).
This gives:
2,400W / 24V = 100A
So a minimum 100A charge controller is needed to handle the full output of the 2,400W solar array to the 24V batteries without overload.
Also allowing a 15% capacity buffer guideline means limiting the solar array to 2,760W (15% above the 100A rating) for this battery voltage.
Step 6: Connect Panels to Charge Controller
Securely connect the positive and negative wires from the solar panels to the respective inputs of the charge controller. Proper connections prevent voltage spikes or dropouts that could disrupt the charging process. Make sure the connections are tight and weatherproof to ensure long-term reliability.
Step 7: Connect the Charge Controller to the Batteries
Carefully connect the positive and negative wires from the charge controller to the positive and negative terminals of the battery bank. Follow the polarity markings on the battery and charge controller to avoid any misconnections. Double-check the connections to ensure they are secure and properly insulated.
Step 8: Connect the Battery Bank to the Inverter
If you intend to use the generated solar power to run AC appliances, you will need an inverter. Connect the positive and negative wires from the battery bank to the positive and negative terminals of the inverter. This will allow the inverter to convert the DC power from the batteries into AC power for household use.
Step 9: Verify System Operation
Once all connections are complete, turn on the charge controller and inverter. Monitor the system’s voltage and current output to ensure it is functioning properly. If there are any anomalies or unexpected behavior, consult the user manuals for the charge controller, inverter, and solar panels to troubleshoot the issue.
Wrapping Up
Completing the major phases from solar panel wattage calculations to optimally sized component selection to safe battery and charge controller connections may seem daunting to PV newcomers. But our guide breaks down the process using an illustrative 8 x 300-watt solar panel mated to 4 battery example. By taking the installation step-by-step, we ease most hurdles DIYers face. Now that you understand the complete flow – working through key design considerations to equipment choices finishing with wiring best practices – you can modify plans for any system scale. Whether your needs involve more or fewer panels or batteries, this model framework sets you up for creating the right-sized, efficient solar installations. Follow the steps of determining your true electric loads, mapping components to production and storage needs, choosing gear that fits together seamlessly, and wiring for performance. This builds the rock-solid foundation for solar energy independence.