How to Make Your Own DIY 500 Watt Solar Kit
Solar energy is an affordable and sustainable way to generate electricity for homes, RVs, boats, and more. As solar technology gets cheaper, DIY solar projects have become popular for people wanting customized off-grid power solutions. With some planning and effort, you can build your own solar kit capable of producing 500 watts of clean renewable electricity!
In this project, we’ll walk through assembling a complete solar power system with the following components:
- Solar panels – 500W mono- or polycrystalline PV panels
- Charge controller – regulates the flow of current to batteries
- Batteries – deep cycle to store solar energy
- Inverter – converts DC to standard AC electricity
- Wiring, connectors, fuses, etc.
Follow along to learn the fundamentals of designing and installing your own solar kit.
Obtain Solar Components for Your DIY Project
Now it’s time to source the key components for your DIY solar kit:
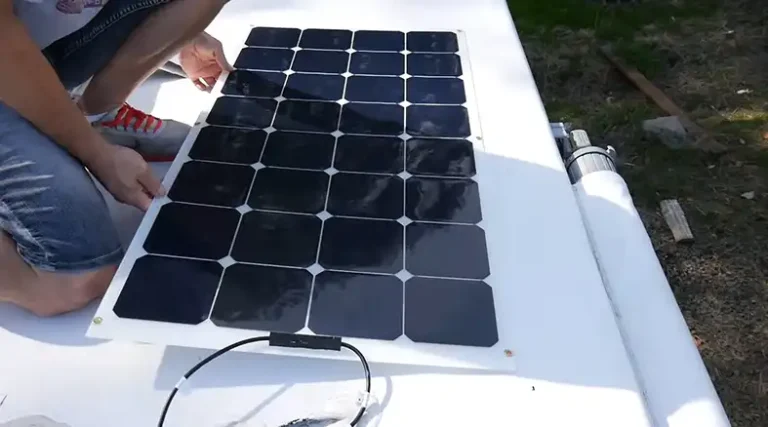
Solar Panels
For a 500W solar system, you’ll need enough 100-250W photovoltaic panels wired together to achieve your target output. Consider monocrystalline silicon panels for the highest efficiency (15-23%) or polycrystalline silicon for more affordability (13-16% efficiency).
When selecting panels, look at specs like open-circuit voltage (VOC), short-circuit current (ISC), cell efficiency, dimensions, and cable connectors. Ensure your charge controller and inverter can handle the total VOC and ISC from your panel array. Allow adequate mounting space for the panel sizes you choose.
Charge Controller
The charge controller regulates the current flowing from the solar panels to the battery bank to prevent overcharging. For a 500W system, choose a 60+ amp MPPT controller to maximize efficiency, however, for a smaller system, 30A MPPT will suffice.
MPPT controllers are more efficient than PWM controllers, especially in low-light conditions or when the solar panels are not operating at their maximum power point. MPPT controllers can extract up to 30% more power from solar panels than PWM controllers, which can result in significant savings over the lifetime of the system.
The controller’s amperage rating must exceed your total solar array amperage.
Look for controllers that can handle your target system voltage (12V or 24V). Check that the controller has the right connections for your solar panels and batteries. Include a remote display for monitoring performance.
Batteries
For a 500W solar kit, you may need 400-800 amp-hours of deep cycle battery storage capacity, depending on your usage and desired days of autonomy. Popular options are sealed lead acid, gel, absorbed glass mat, or lithium batteries designed for solar storage use.
When selecting batteries, opt for models rated for repeated deep discharges to withstand frequent solar cycling. Choose batteries that can connect together to achieve your system voltage. Pay attention to maximum discharge rates, charging parameters, and warranties.
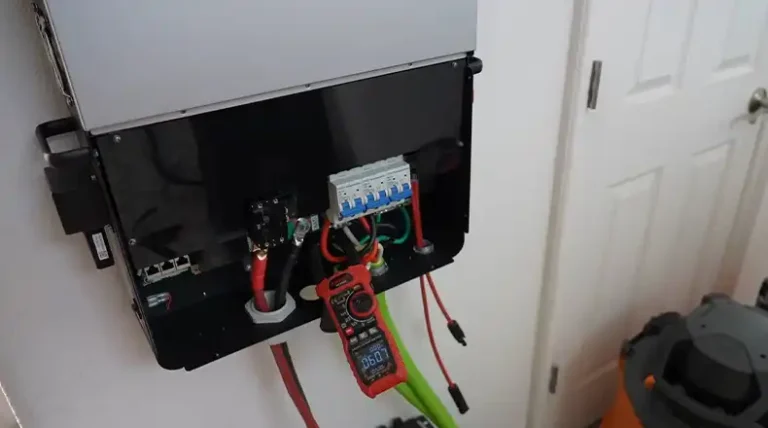
Inverter
A pure sine wave inverter converts the DC electricity from the batteries into 120/240V AC power to run household appliances and devices. For a 500W solar system, choose an inverter rated for 1000W for adequate headroom. Ensure the inverter is designed for off-grid solar applications.
Check that the inverter’s DC voltage range works with your battery bank and has the appropriate outlets, efficiency ratings, surge capacity, and connectivity features you require.
Wiring, connectors, conduit
Wiring
Wiring is the electrical pathway that allows electricity to flow from the solar panels to the charge controller, battery, and inverter. The type and size of wiring used will depend on the amperage of the system. For example, a 12V system will typically use 10-gauge wire, while a 24V system will typically use 8-gauge wire.
It is important to use high-quality solar cables that are rated for outdoor use. Solar cables are designed to withstand the harsh conditions of the outdoors, such as UV radiation and extreme temperatures.
Connectors
Connectors are used to connect the different components of the solar power system together. The most common type of connector used for solar power systems is the MC4 connector. MC4 connectors are quick and easy to connect and disconnect, and they are also very weatherproof.
It is important to use the correct type of connector for each component of the system. For example, you should not use an MC4 connector to connect a solar panel to a battery. Instead, you should use a battery cable connector.
Conduit
A conduit is a pipe that is used to protect the wiring from damage. The conduit is typically made of PVC or metal. It is important to use a conduit that is rated for outdoor use and that is the correct size for the wiring.
Conduit should be used in areas where the wiring is exposed to the elements, such as on the roof or on the side of a building. It should also be used in areas where the wiring is likely to be damaged, such as in a crawlspace or attic.
Sizing the System
Decide on an Appropriate System Voltage
One of the first things you need to do is decide on the system voltage for your setup. The most common system voltages are 12V and 24V. The voltage you choose will determine the type of solar panels, charge controller, inverter, and batteries you need to purchase.
In general, a 12V system is a good choice for small to medium-sized systems, while a 24V system is a better choice for larger systems. A 24V system can handle more power and is more efficient than a 12V system. However, a 24V system is also more expensive than a 12V system.
Wire the Solar Panels in Series and Parallel
Once you have decided on a system voltage, you need to wire the solar panels together in series and parallel. Wiring the panels in series will increase the voltage of the system while wiring the panels in parallel will increase the amperage of the system.
The specific configuration of your solar panel array will depend on the number of panels you have and the desired output of your system. You will need to follow the instructions in your charge controller manual to determine the optimal panel configuration for your system.
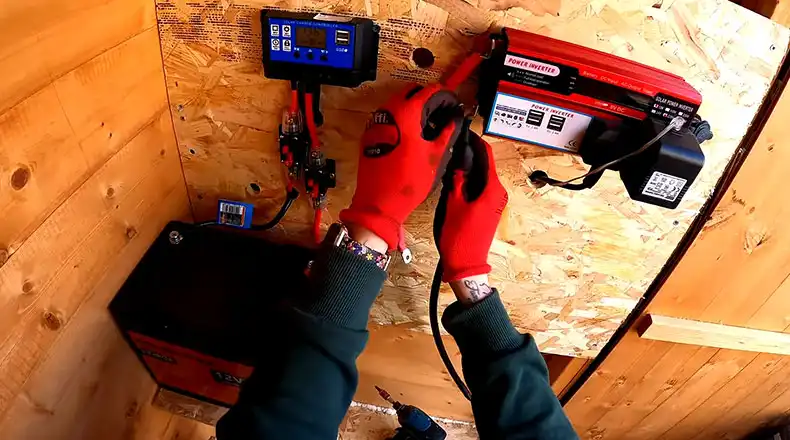
Connecting All the Parts into a Cohesive System
Now that you have all of the components for your solar power system, it’s time to connect them all together. This process can be a bit daunting, but with careful planning and execution, it can be done safely and effectively.
Step 1 – Choose an appropriate location to mount your solar panels. Consider optimal sun exposure, local building codes, roof load capacity if mounting on the roof, and ease of access for wiring and maintenance.
Step 2 – Mount the solar panels using strong, corrosion-resistant brackets secured into roof rafters or concrete footings. Angle the panels facing south at a 30-45 degree tilt for ideal alignment.
Step 3 – Run 10 AWG solar-rated copper wires from the panel array in a weatherproof conduit to the charge controller. Connect the wires to the controller’s solar input terminals, matching polarity. Add fuses or breakers.
Step 4 – Use a minimum of 8 AWG copper wires in the conduit to connect the charge controller output to the battery bank, fused at both ends. Verify polarity – positive to positive, negative to negative.
Step 5 – Connect the battery bank to the inverter using 6-8 AWG high-strand copper wires sized for the DC amperage load. Keep runs short to limit voltage drop.
Step 6 – Feed the AC output from the inverter through a dedicated circuit breaker in your main electrical panel. Use 14 AWG or thicker wire for this run.
Step 7 – Carefully check all wiring connections against circuit diagrams. Secure loose cables. Confirm solar panel, battery, and inverter programming settings.
Step 8 – Test by powering on the inverter and connecting a small appliance or light. Verify the system is producing power and the voltage/current parameters are as expected.
Step 9 – Conduct a functional and safety inspection before considering the system online and ready for daily use.
Install Safety Features
Properly installing safety equipment prevents accidents and damage:
- Use fuses or DC breakers sized for the expected load on all wiring runs connecting components.
- Install lightning surge arrestors to divert damaging transient voltage spikes.
- Earth grounds the system using grounding rods driven into the soil to direct uncontrolled current.
Adhere to all local electrical codes for permitted installations. Safety first!
Using and Maintaining the System
Once installed, here are some tips for optimal solar system operation:
- Monitor performance – check power output, battery charge state, etc., and log results.
- Keep panels clear of debris, snow, and shadows for maximum production.
- Ensure cables are secure, battery terminals are corrosion-free, and connections are tight.
- Adhere to battery maintenance guidelines – check electrolytes, and prevent deep discharge.
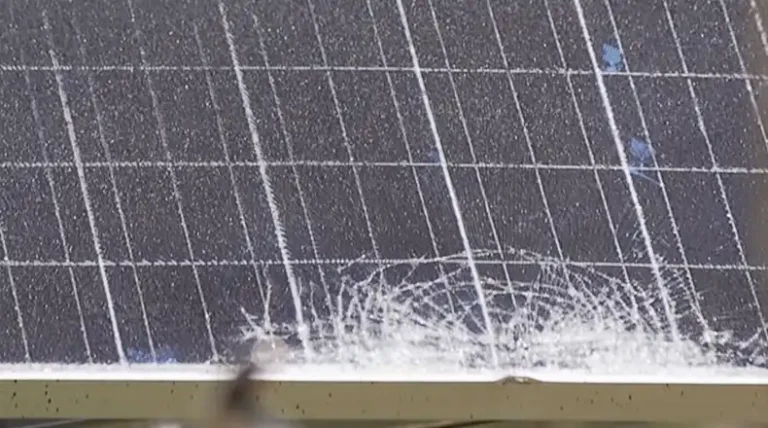
- Inspect routinely for damage, and wear to components which could affect function or safety.
Your solar kit will provide years of reliable off-grid power if properly maintained!
Conclusion
Constructing your own solar energy system is an incredibly rewarding project that allows you to generate renewable electricity customized to your specific needs. While it requires research, technical skills, and quality components to build a solar kit safely, the energy independence and cost savings over time make it a worthwhile pursuit. Start with a reasonable system size like a 500W setup so you can learn the fundamentals. As you gain experience, you can expand your solar capacity and capabilities. Use this guide to help turn the sun’s rays into usable solar power. With some diligence and common sense, you’ll be well on your way to harnessing clean solar electricity!