How to Tell if Your Ring Solar Panel is Working | What are the Signs
When set up properly in an ideal location, Ring solar panels can effectively harness sunlight to charge compatible Ring device batteries and ensure continuous operation. However, issues like damage, debris, insufficient sunlight, and improper setup can prevent your solar panel from working effectively.
Knowing whether your Ring solar panel is functioning correctly is important to keep your Ring devices powered and secure. So How to tell if your solar panel is working correctly?
Fortunately, there are signs you can check to determine if your Ring solar panel is charging correctly. Additionally, simple troubleshooting steps, efficiency tips, and alternative power options can help optimize solar capabilities and keep your Ring devices online even when solar power is not readily available. Let’s learn them all below!
Signs Your Ring Solar Panel is Working Properly
The key indicators that your Ring Solar Panel is functioning as expected include:
Battery Icon Shows “Charging” Symbol
The first place to check is the battery icon in the Ring app or desktop dashboard associated with the connected device. When functioning properly in sunlight, it will display a small lightning bolt icon to denote active charging. This visual cue confirms power is being collected from the solar panel and transferred to charge the device battery.
NOTE: Showing “Not Connected” can be normal if the battery is above 90%.
Illuminated Green LED Light
Another clear sign of proper operation is the bright green LED indicator light on the solar panel itself. When functioning normally, this light will be steadily illuminated as long as adequate sunlight is available. Its absence likely indicates an issue with positioning, debris blockage or physical damage affecting performance.
Device Charging Notifications
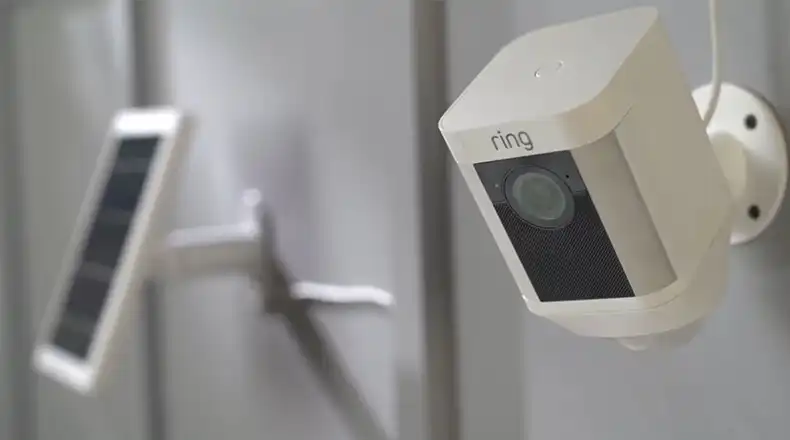
Devices like the Ring Spotlight Cam Solar can provide active notifications when solar charging starts and stops. So if you receive an in-app alert that solar charging has commenced, it’s a reliable confirmation that the panel is harnessing sunlight and performing properly.
Increasing Battery Percentage
Of course, the ultimate proof is visible in the associated battery percentage. When solar charging works correctly, you’ll see that percentage rise incrementally over time, denoting effective energy transfer from the panel to the battery. If the battery level remains stagnant or drops, it signals a lack of solar charging.
Observe Device Performance
If your Ring device (e.g., doorbell, camera) is working as expected without frequent battery replacements, it’s a strong indication that the solar panel is supplying sufficient power.
By cross-checking these indicators periodically, you can validate that your Ring solar panel is collecting sufficient sunlight and properly converting it to charge power. But what if you aren’t seeing these signs of correct functionality? Let’s explore troubleshooting steps to get your solar panel working properly.
How to Troubleshoot if Your Ring Solar Panel is Not Working
If your Ring device lacks a charging icon, illuminated LED light, power notifications, or incremental battery gains from the connected solar panel, try these troubleshooting tactics:
1. Check for Physical Damage
- Carefully inspect the entire solar panel surface and edges for cracks or dents in the casing
- Use a microfiber cloth dampened with warm water to gently clean the panel surface, removing any dirt, debris, bird droppings, or other deposits that could block sunlight
- Check for corrosion or mineral deposits on the cables and connections between the solar panel and Ring device and clean contacts with alcohol and cloth if present
- If physical damage impacts more than 30% of the panel surface or if corrosion cannot be fully removed, replacement may be necessary
2. Ensure 6 Hours of Direct Sun Exposure
- Use a compass app on your phone to orient the Ring solar panel perfectly south if you live in the northern hemisphere (north if in the southern hemisphere)
- Angle the panel for maximum sun exposure from 10 am until 4 pm in most regions to meet 6-hour minimum
- Identify and trim any surrounding vegetation or move other objects that may cast shadows blocking irradiation, keeping a minimum 10-foot sunlight clearance area
- Consider using the optional adjustable pole mount to pivot and tilt solar panels to track optimal angles as seasonal sunlight shifts
3. Confirm Device & Cable Compatibility
- Verify solar panel watt rating matches device requirements (for example, using a 20W panel with a device that only supports 10W panels)
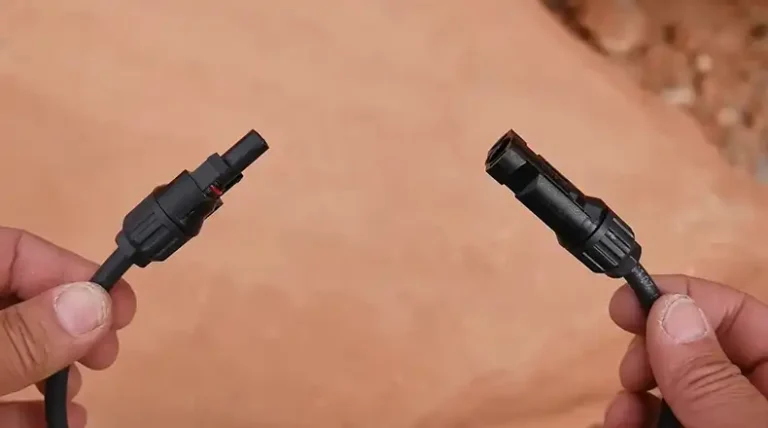
- Check that all connectors and cables between the solar panel and the Ring device are the manufacturer-approved components
- Inspect wiring between the solar panel and device for damage, loose connections, or splicing issues impeding conductivity
- As needed, acquire and utilize manufacturer-approved cable between the solar panel and Ring device to re-establish compatibility and conductivity
4. Reset Connections & Adjust Position
- Unplug and then reconnect all cables between the solar panel and Ring device to reset the connection
- Consider moving the Ring device and solar panel to an alternative location meeting sun exposure guidelines if existing areas have too much shade/obstruction
- Use smartphone compass and solar tracking apps to identify optimal directional faces and angles as conditions and seasons change
- Adjust tilt angle and direction up to 45 degrees east/west to compensate for morning/afternoon shadows
5. Check Battery Levels Pre- & Post Troubleshooting
- Note the exact battery percentage prior to making any adjustments
- After changes, allow the solar panel to charge in full sun for the minimum 1-hour duration
- Check battery percentage after the charging period to look for percentage gains confirming functionality
- If the percentage does not increase after adjustments, additional troubleshooting or replacement is likely necessary
Persisting issues may indicate the need for solar panel replacement if physical damage is present. But first, ensure proper setup and maximal solar exposure to give your Ring solar panel the best chance of functioning efficiently.
How to Maximize Ring Solar Panel Efficiency
To optimize daily solar collection and charging performance, consider these efficiency tips:
- Face Solar Panel South (Northern Hemisphere)
In the United States, Canada, and Europe, face panels directly south to receive the most direct sunlight. Facing slightly southwest can also compensate for afternoon shadows. Southern hemisphere locations should face panels north.
- Choose Locations with 5-6 Hours of Direct Sun
Locate your Ring solar panel in areas that receive direct, unshaded sunlight for at least 5 to 6 hours daily. More sun exposure equals more charging potential. Track sunlight patterns in the installation area to identify the best placement.
- Clean Regularly to Avoid Dust and Debris Buildup
Use a microfiber cloth to wipe down solar panels weekly, avoiding the use of liquids or chemicals. Built-up dust, pollen, and debris block sunlight, reducing charging capabilities over time.
- Inspect Cables for Damage
Check that all cables and wiring connecting your solar panel to Ring devices are intact and undamaged. Fraying, chewing, or disconnected wires prevent energy transfer. Replace damaged cables immediately.
- Consider Upgrading to Larger Solar Panels
If one panel can’t provide adequate charging for your needs, add additional solar panels or upgrade to higher 10W or 20W panels with larger surface areas for more sunlight collection. Just ensure your Ring device supports higher-watt panels.
Optimizing these variables helps maximize solar capabilities, ensuring your Ring solar panel works efficiently as a reliable, renewable energy source for your devices. But what about times when solar power just isn’t available? Let’s examine some power alternatives.
Alternative Power Options for Ring Devices
During winter months or in consistently overcast regions, solar power collection may prove inadequate to meet Ring device demands. In these scenarios, consider supplementing with:
- Hardwired Power Connection: Some Ring devices allow for direct AC power connections via MicroUSB for continuous, uninterrupted power instead of solar. Hardwiring avoids battery drain concerns but does require permanent cabling.
- Smart Plug to Conserve Battery: Connecting a compatible Ring device to a solar-charging external battery pack via a smart plug enables battery conservation by only powering the device when motion events occur. This avoids full-time battery drain when not needed.
- Extra Batteries for Quick Swaps: Keep spare batteries fully charged and swap into Ring devices as needed when solar charging lags. Allow depleted batteries to charge inside via other power sources, rotating between packs for continuous uptime.
Inevitably, solar power has limitations – but the goal is to optimize panel setup, location, and exposure to make it a reliable source for Ring devices when possible. By converging solar capabilities with smart supplementation as needed, you can enjoy seamless security camera coverage and protection powered by the sun!
FAQs Time
How Long Should It Take Ring Solar Panels To Charge The Battery?
With full direct sun exposure, Ring solar panels typically take 7 to 8 hours to fully recharge a completely depleted battery. Fast initial charging occurs in the first 2 to 3 hours, with slower sustained charging rates after that. Overcast days take longer.
How Long Should A Ring Solar Panel Last?
Properly maintained Ring solar panels typically last between 2 to 4 years under normal use before showing degraded performance. Choosing optimal positioning, regularly cleaning panels of debris, and avoiding physical damage can extend the average lifespan closer to 5 years.
Conclusion
Keeping your Ring devices continuously powered is crucial for security and peace of mind. When set up properly, Ring solar panels can be an extremely effective renewable energy source to keep batteries charged without any unusual maintenance or associated expenses.
By taking a few simple steps, you can ensure your Ring solar panels are working optimally and providing reliable power to your security devices. Monitoring key indicators, ensuring optimal sun exposure, and conducting minor troubleshooting will help you maximize your investment and enjoy the peace of mind that comes with a well-functioning solar-powered security system.