How to Pass a Solar Inspection | Ultimate Guide
One of the final and most crucial steps of installing a solar panel is passing the solar inspection – but for many homeowners, there is uncertainty around what exactly inspectors look for and how to prepare.
The solar inspection process can no doubt cause anxiety. You have to check that your solar installation meets strict safety and functionality standards before the utility company approves the system. Basically, having a solid understanding of inspection criteria and properly planning throughout the installation process is key.
By being informed and strategic with solar contractors, most homes see solar inspections go off without a hitch. Continue reading as we dive deeper into solar inspection specifics and steps you can take to confidently breeze through.

What Is Inspected in a Solar Inspection
Solar inspectors are checking a wide range of criteria during the inspection process. The scope covers everything from the physical solar panels to the inverter and electrical connections. Key inspection points include:
Photovoltaic Panels
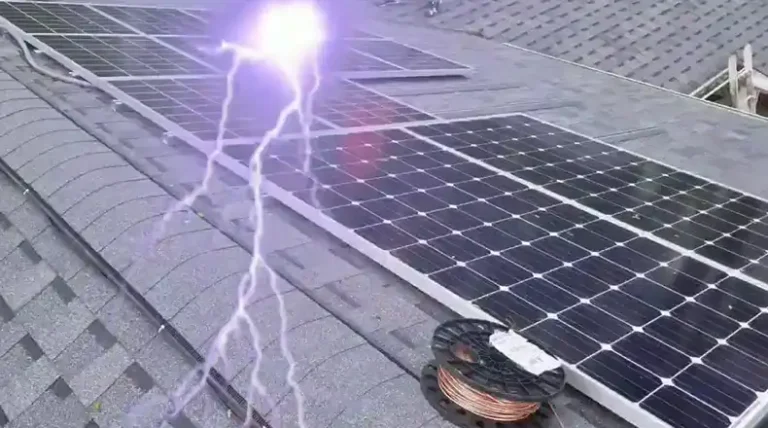
- Installation methods – inspectors will check that solar panel mounting follow code requirements for roof penetration, lag bolt quantity/depth, etc. They’ll verify mounting equipment is properly grounded and installed securely enough to withstand wind loads.
- Wire management – wires and connections between panels need to be secured properly and use compatible connectors/cabling. Inspectors will check for neat wire management with no loose hazard wires.
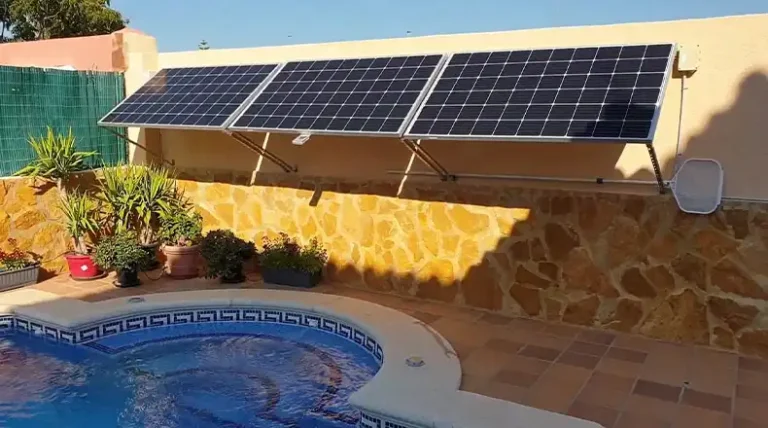
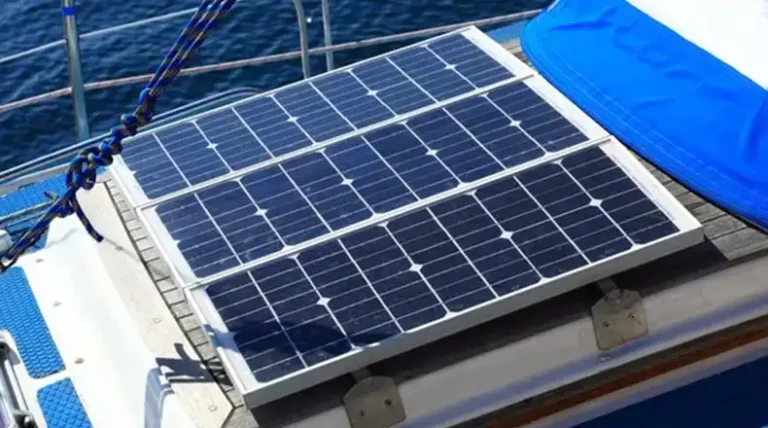
- Array configuration – placement and orientation of panels will be inspected to ensure optimal sun exposure and output.
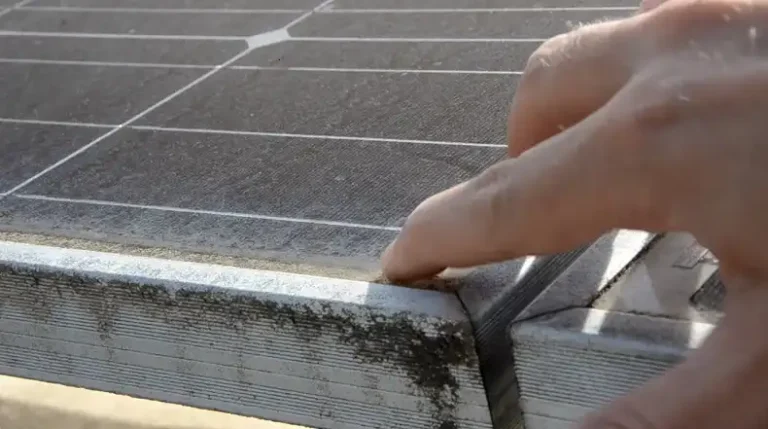
- Physical panel condition – inspectors will check for broken solar cells, no debris/pests, and overall intact waterproofing.
Inverters/Metering
- Inverter testing – proper input/output voltages and frequency synchronization will be validated.
- Physical connections – tidy wire management will be checked. Inspectors ensure wires are properly sized with no exposed conductors.
- Breakers – inspectors will verify ratings of solar breakers/fuses and ensure they’re compatible and labeled correctly.
- Meter/production meter – inspectors validate correct transmitter settings, meter condition, seals, and display readout.
Racking
- Attachment methods – roof/ground lag bolt depth meets wind/seismic requirements. Surface mounting hardware properly secures racks.
- Grounding/bonding – racks have properly grounded conductors bonded throughout.
- Penetrations – roof attachments properly penetrate rafters and are flashed/sealed correctly.
Electrical Connections
- Point of connection – wiring and overcurrent devices between the solar system and electrical panel will be checked thoroughly.
- Breakers and labeling – appropriate breakers isolating solar circuits are present and labels are clear.
- Wire management – all wires are properly secured, sized appropriately, and contain no loose/exposed conductors.
As you can see inspectors rigorously assess solar installations, so sealing permit approval requires covering numerous standards. The intricacy is precisely why partnering with reputable solar firms who remain code-conscious is so important. Still, even when working with great contractors, understanding inspection criteria helps homeowners better navigate the process.
How to Prepare for and Pass Solar Inspection
Passing inspection should be the expectation with new solar installations when homeowners make solar permitting/inspection prep a priority from the start. By optimizing preparations, you can feel assured on inspection day and quickly move on to reaping the solar rewards.
Step 1: Do Your Homework on the Solar Permitting Process
Don’t wait until solar contractors are onsite to understand permitting. Reach out to your local building department early and find out specifics on documentation needed for permit approval in your area. Officials can also clarify if your city/county requires special structural engineering stamps or has additional wind/seismic considerations. Solar proposals can then factor these items inappropriately.
Stay informed on the timeline as well – some areas see permit approvals take weeks while others help streamline solar permitting. Knowing processing times allows better project scheduling.
Step 2: Thoroughly Vet Prospective Solar Installers
Finding solar firms truly fluent in local codes is paramount – this expertise translates directly into passing inspections. As you evaluate contractors, don’t just ask about their years in solar or total installs but dig into their inspection success rate specifically. What percentage of their solar projects pass initial inspection without rework needed? The right solar partner understands inspection criteria innately and guides customers appropriately from project onset.
Also, clarify what specific steps contractors will take to prep for inspection. Will they complete in-house checks of all work beforehand using official inspection criteria? How specifically will they ready you for inspection day? Insist on answers to these pointed questions upfront.
Step 3: Adhere Closely to Solar Panel Guidance
Your solar team should provide clear instructions on panel positioning for optimal sun coverage. While adjusting panels hastily to fit more on your roof may be tempting, stay true to placement guidance. Inspectors will check that orientation aligns with plans and provides expected output. Let your installer guide array layout and deployment strategies – they account for inspection standards upfront.
Step 4: Keep the Solar Job Site Organized
While timelines get tight on installs, discourage contractors from leaving tools/debris strewn about or creating tripping hazards. Not maintaining order can cause inspection failures. Together with contractors, regularly consolidate tools, contain trash, and tidy wiring/connections. Your tidy job site lets inspectors easily navigate the system.
Step 5: Be Present for the Inspection
The solar inspection provides important quality assurance for homeowners so make it a priority to attend. Walk the system alongside the inspector listening for feedback and asking questions. Being present also allows for swiftly addressing any minor issues they flag onsite so an inspection can pass that same day. Don’t leave it solely to your contractor – be an active participant in this pivotal process.
Step 6: Quickly Resolve Any Failed Inspection Points
Should inspection uncover issues requiring remedy prior to final approval, waste no time addressing them with solar contractors. Whether wiring refinements, conduit adjustments, or racking modifications, complete rework swiftly. Communicate transparently with inspectors on the plan of action and timeline so they know the status. Staying on top of items and keeping inspectors looped in helps progress inspection approval without delay.
Tips to Find the Right Solar Inspector
Solar inspectors certainly hold valuable expertise but also look for ones understanding of the needs of local homes and solar technology subtleties. County/city inspectors handle solar occasionally while third-party-focused solar inspectors live and breathe PV daily. Some key considerations when researching inspector options:
- Experience Level – ask about a number of solar inspections conducted over their career as well as the percentage passing initial inspection. Look for extensive success specifically locally including your home’s metro area.
- Solar Specialization – while many home inspectors cover solar minimally, target those focused purely on solar PV. They understand nuances traditional inspectors can overlook. Ask about their solar-specific training and involvement with industry groups.
- Local Market Expertise – inspectors well-versed in local building codes and permitting needs can better assess compliance. Clarify their experience with city/county jurisdictions in your area before coming onsite.
- Credentials – licensure demonstrating solar competency like NABCEP certification is reassuring for homeowners. It confirms rigorous solar training and controller examination on the latest PV best practices.
The inspection process undoubtedly induces some nerves, but homeowners remembering the steps above can feel empowered taking it on. Staying code-conscious from system design through installation, vetting your solar team thoroughly, and closely prepping for inspection day pay dividends when approval is secured. Maintain open communication with solar pros and inspectors throughout and you’ll soon be plugged into your new solar system!
What Are The Most Common Reasons Solar Inspections Fail?
Some top reasons solar inspections fail include incorrect array positioning/shading, loose job site wires and debris posing tripping hazards, incorrectly sized overcurrent devices/wiring, insufficient wire management allowing exposed conductors, and inadequate lag bolt depth/quantity on racking attachments.
How Soon After Installation Is The Solar Inspection?
Solar inspections typically occur within 1-2 weeks of installation wrap-up. However, timelines vary among permit jurisdictions so confirm specifics with your local building department. Also, account for lead time based on inspector availability in your area when scheduling projects.
What Happens If The Solar Inspection Fails?
Should an inspection uncover issues not yet meeting the code, you’ll receive a written report detailing items needing remedy prior to final approval. Demonstrating fixes made, your solar contractor can then coordinate a return site visit so the inspector can validate updates. Additional inspection fees rarely apply for minor first-time failures.
Can Solar Inspections Be Done Remotely?
Some inspection departments offer remote solar inspections using technologies like drone footage, installer videos/photos, and live video chatting. This allows inspectors digital visibility to reduce trips onsite. However, in-person visits checking all physical connections are still the norm for most permit offices currently. This will likely shift over time.
Who Pays For The Solar Inspection?
Solar inspection fees are typically built into overall system pricing quoted by installers upfront. Additional minor re-inspection costs may apply if failures occur, but solar firms often absorb these nominal expenses as well. Clarify inspection pricing inclusions with prospective contractors when comparing proposals.
End Notes
In conclusion, passing solar inspection should be the expectation, not the exception, when homeowners take the right steps to prepare. Doing your due diligence on local permitting procedures, insisting solar contractors make inspection readiness central to their process, adhering to panel positioning guidance, maintaining an organized job site, actively participating in inspection day, and swiftly addressing any feedback provided after inspection gives you the formula for success. I appreciate you taking the time to read my article. Please let me know in the comments if you have any other questions regarding this topic. I am happy to assist further where I can. I wish you great success with your solar panel inspection and many sunny days ahead!