How Much Space is Between RV Roof and The Solar Panel?
Living the RV lifestyle comes with the freedom of the open road. However, ensuring constant access to power for appliances and devices requires some planning. Installing solar panels on your RV roof provides renewable energy from the sun. But how much airspace should you allow between the roof and panels? Getting this right improves performance and extends the roof’s longevity. In short, the spacing is around 1 to 2 inches.
I did extensive research into solar panel mounting best practices for RVs. In this article, I’ll share key insights on ideal spacing, factors that impact spacing considerations, how to achieve proper clearances, and the implications of insufficient gaps. Whether you are installing panels yourself or working with an installer, understanding these key points will lead to the best outcome.
So let’s get started! Here is everything you need to know about the spacing between RV roofs and solar panels.
Reasons For Leaving Space Between Roof And Panels
There are several important reasons to allow a gap between solar panels and the RV roof surface:
Allow Airflow To Prevent Overheating
Like any electronic equipment, solar panels function best at cooler operating temperatures. The airflow space lets heat dissipate so the panels stay in the optimal temperature range. Trapped heat degrades power output.
Account For Some Flex In The Roof
An RV roof experiences expansion and contraction with temperature changes. Leaving breathing room averts any buckling issues. It also avoids physical panel contact that can abrade the roof over time.
Make It Easier To Walk Around Panels For Cleaning/Maintenance
You need periodic access to solar panels for cleaning off dust, tree sap, and other debris that blocks sunlight. Having space around the panels provides solid footing for carefully walking on the roof. Things can get slippery up there after a rain!
Allow Room For Attachments And Wiring
The panel connections, conduits, and anchor bolts all occupy some vertical room underneath the panels. Factor this hardware into the spacing considerations too.
Now that you know why it’s important, let’s examine the factors that actually determine the ideal spacing.
Factors Affecting Spacing Between RV Roof and Solar Panel
The prime considerations for dialing in the right amount of air gap come down to roof shape and solar panel mounting angle.
Roof Shape
The RV roof design drives some natural airflow and has construction differences to factor in.
Flat roof
A flat roof relies heavily on the clearance gap to promote cooling airflow over and under panels. The flat surface leaves no room for convection currents to develop. Recommend maintaining around 2 inches of clear passage for sufficient ventilation. This also gives needed allowance for roof expansion on hot days.
Curved roof
A curved or slightly angled roof shape inherently builds in more air channel space. The grade change gets the air moving past the panels. This natural ventilation means you can get by with a bit less deliberately engineered gap – about 1 inch typically suffices. But still, allow some extra margin if installing near the roof apex where temperatures and expansion will be higher.
Panel Angle
The tilt angle of the solar panels also plays a role in the spacing equation.
Flat panels
When panels are mounted flush and horizontally to the roof, the 2-inch spacing rule of thumb definitely stays in effect. The lack of tilt cannot rely on convection to move heat off the backside of the panels. The entire burden of temperature regulation depends on airflow through side gaps.
Angled panels
Tilted solar panel installations allow rising warm air to freely exit from under the elevated edge. The natural chimney effect from angling enables sufficient ventilation with just 1 inch of spacing from the roof membrane. The key is ensuring the high end has an unobstructed opening for hot air to escape as cooler air draws in from the low side.
Now let’s drill down on exactly how to fine-tune the gap allowance to hit the sweet spot when mounting solar panels.
How to Achieve the Right Amount of Spacing
Careful planning ensures your panels have their minimum operating clearance without going overboard and losing potential solar collection real estate. Here are 3 tips for dialing in excellent spacing:
Use Properly Sized Mounting Brackets/Hardware
The thickness of the mounting feet determines the baseline gap. So be sure to get hardware engineered specifically for curved RV roof structures. Custom bracket solutions like the RV Solar Mounting Kit accommodate the ideal 1-2 inch clearance while maximizing panel surface adhesion.
Adjust Placement As Panels Are Installed
It takes a bit of finesse to space out multiple solar panels across an RV roof. As each one goes down, visually confirm adequate ventilation channels remain between it and adjacent panels. Also, double-check that the borders have suitable perimeter gaps.
Use Weatherproof Spacers/Washers If Needed
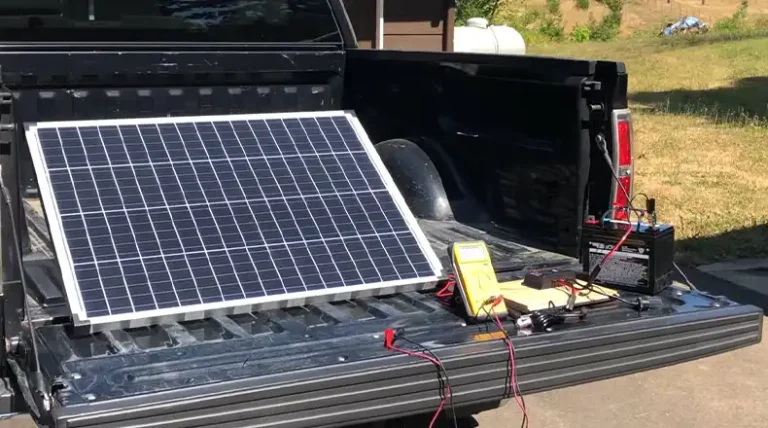
For DIY solar panel projects, plastic or rubber washers come in handy for shimming up panels to the desired spacing height. But keep fastener strain relief in mind if improvising too much. Getting help from an experienced RV solar installer takes the guesswork out of pitching the perfect elevated fit.
Effects of Insufficient Space Between Solar Panel and RV Roof
Beyond suboptimal power production, an insufficient air gap invites all sorts of performance and equipment longevity issues over time including:
This Can Lead To Overheating Problems
Without enough airflow to carry away heat, solar efficiency drops while components bake. Electronics lifespans shrink exponentially as operating temperatures rise. A hot roof also accelerates the degradation of the panels’ weatherproof lamination.
Makes Panels More Difficult To Maintain
You literally have no wiggle room to walk panels coast-to-coast for periodic cleaning and tune-ups. And good luck reaching the middle ones! Better to incorporate maintenance access upfront with proper clearances.
Can Accelerate The Deterioration Of The Roof
When panels physically touch down on the roof, the contact points can abrade the membrane with thermal expansion/contraction cycles. Trapped moisture also remains in contact longer while ventilation and UV radiation are blocked. Premature wear sidelines the roof’s weatherproofing.
I hope
this overview gives you a heightened awareness of properly spacing solar panels above your RV roof. Please leave any lingering questions in the comments section below! Thanks for reading – and happy gap gauging for your next solar project!
Questions You May Ask
- How do I account for snow accumulation with my solar panel spacing?
Great question! For RVs camping in snowy conditions, add an extra 1⁄2 to 1-inch gap allowance so the weight of snow doesn’t overwhelm panels onto the roof. The extra space prevents broken brackets/fasteners too.
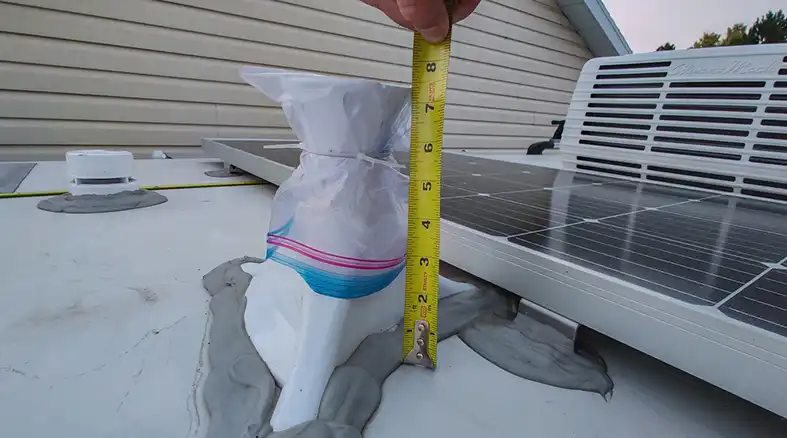
- What is the best way to gauge spacing for my specific RV roof?
Using a small ruler with an integrated level, measure from the roof surface up to the underside of the panel’s frame at all four corners. Average together the figures for overall clearance. Adjust bracket heights gradually until the spec is dialed in.
- Can I use wood spacers instead of plastic?
Wood should be avoided since it will eventually rot, inviting mold/moisture issues. Use weatherproof plastic or composite material spacers rated for outdoor use instead.919
They resist deterioration better over the long haul.
- Should I leave extra clearance near ceiling exhaust vents or AC units?
Leave ample extra space near heat-releasing roof components. Their plumes of warm exhaust air need an unfettered vertical escape. An extra inch further prevents recirculation buildup.