Complete Guide for 48V Using EG4 18k Hybrid Solar Inverter
Achieving energy independence is now within reach with the advanced EG4 18k hybrid solar inverter. Specifically designed for use in 48V battery-based systems, this 18,000W unit unlocks the full potential of solar energy storage. In this comprehensive guide, we explore the specifics of integrating and optimizing the EG4 for complete off-grid capability or grid interactivity.
As a quick primer, the outdoor-rated EG4 enables roof-top solar panels to efficiently charge a 48V home battery bank during the daytime. The stored energy powers your home’s loads as needed, especially valuable overnight and during grid outages. Compatible battery options range from lithium to lead-acid chemistries depending on budget and site constraints.
Configuring the inverter properly is vital to maximize solar usage and battery life. We cover step-by-step wiring, critical programming settings, safety best practices, and remote monitoring. Follow along to gain the knowledge to install and operate your 48V solar system with confidence. The freedom of reliable and renewable electricity is closer than you think when equipped with the correct information.
Key Features of EG4 18K Using 48V
The EG4 18k inverter is purpose-built for 48V battery banks and has an 18kW power capability. This enables a robust solar input of up to 18kW from an appropriately-sized PV array. 12kW of continuous AC output power can be supplied to household loads.
A notable benefit is the simultaneous charging and power delivery made possible by the advanced MPPT charge controller. Solar power above what is needed for loads will efficiently charge batteries without interruption.
Specifications of EG4 18K:
– Model: EG4-18KPV-12LV
– Output Power: 12000W
– PV Input Power: 18000W
– Input Voltage: 48V
– Output Voltage: 120/240VAC
– Phase: Split Phase
– Compatibility: Residential and Commercial applications
The outdoor-rated construction and integrated safety features like rapid shutdown allow flexible installation. Either off-grid or grid-tied setups are supported.
Seamless backup power with UPS-like capabilities provides peace of mind. Critical loads stay powered even during grid failures.
Remote monitoring and control via smartphone apps or web browsers enables access to performance metrics and programming changes when required.
Overall, the high power capacity, safety, quality components and advanced algorithms of the EG4 18k make it a premier choice for robust 48V solar energy systems.
Process of Installation EG4 18k
The installation of the EG4 18k is straightforward but should be done with care and safety precautions. Selecting an appropriate location is key as discussed prior.
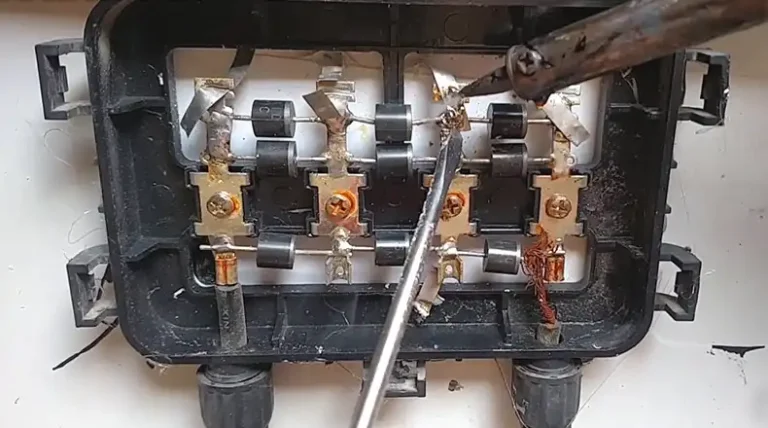
Electrical connections to batteries, PV arrays, generators, loads and grounding must adhere to cable gauge specs and tightening torques. Double check wiring before energizing.
With flexible MPPT channels for solar inputs and an interactive LCD screen, configuring battery and load parameters is simplified. Off-grid, grid-tied and selling excess power modes can be activated with ease.
While streamlined for an 18kW-capable unit, taking time to securely fasten, electrically connect and configure the EG4 properly ensures optimal performance and longevity as the heart of a property’s solar energy system. Adhering to eg4’s recommendations throughout the installation process is advised.
Installation Location and Considerations
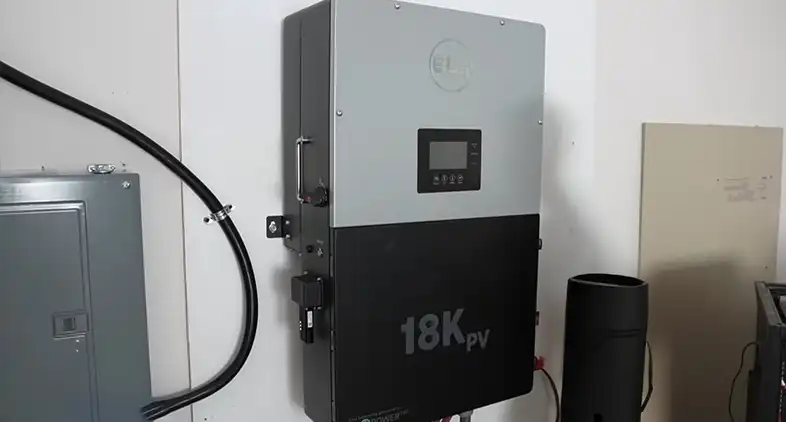
a. Suitable Location: The EG4 18k’s durable IP65 enclosure allows versatile mounting both outdoors and indoors. Well-designed wall brackets accommodate different stud arrangements. Proper air circulation is vital so ensure adequate clearance around the unit adhering to manual specifications. Physical security of the 120 lb device is also important.
b. Protection: If installed outdoors, avoid direct exposure to sunlight and precipitation. The enclosure can withstand weather elements but performance and longevity will benefit from a covered location. Consider eye-level mounting for convenient access to the informative display.
Overall, leveraging the flexible mounting capabilities of the EG4 requires forethought about placement to maximize airflow, weather protection, safety and ease of access. With robust construction and intelligent power management, ideal mounting helps this inverter shine.
Electrical Connections
Here are the steps for making the electrical connections to the EG4 18k inverter in a 48V battery system:
1. Turn Off Breakers: Verify all breakers and disconnects related to batteries, PV arrays, generators etc are switched OFF for safety
2. Connect 48V Battery Cables
– Locate the positive and negative terminal blocks
– Select the appropriate AWG size cables
– Connect the battery bank observing polarity
3. Adhere to Wire Gauges
– Consult manual for recommended wire gauges
– Size wiring based on current draws and run lengths
– This prevents overheating issues
4. Connect Protective Earth (PE) Ground Wire
– Locate PE bus bar
– Attach system grounding conductor properly
5. Connect Generator/AC Couplings
– Generators wire into the GEN terminals
– For AC couplings use the L1/L2 terminals
– Ensure phasing is properly matched
Following these steps carefully allows safe and successful electrical integration of the EG4 into the property’s 48V solar energy system.
PV Array Inputs
Here are the steps for connecting the PV array inputs to the EG4 18k inverter:
PV Inputs
1. Locate the MPPT Charge Controller
– The inverter has 4 MPPT channels
– Used to connect PV arrays
2. Utilize the Multiple MPPTs
– MPPT1 can take 2 matched PV strings in parallel up to 25A
– MPPT2 and MPPT3 can take separate strings up to 15A each
3. Connect First PV String
– Observe polarity with positive/negative terminals
– Tighten terminals securely on MPPT1
– Repeat for second string to MPPT1 for parallel configuration
4. Connect Additional Strings
– Connect next PV string to MPPT2
– And another to MPPT3 if needed
– Ensure currents do not exceed ratings
Taking advantage of the multiple MPPT channels enables flexibility in solar array layouts and expansion capability over time. Follow the steps above while adhering to the current specifications when wiring the PV inputs.
Choosing the Right Battery Bank
Here are the steps for choosing the right 48V battery bank for the EG4 18k inverter system:
1. Research Battery Options
– Consider lithium vs lead acid tradeoffs
– Look at depth of discharge and lifespans
2. Calculate Load Demand
– Evaluate average and peak household loads
– Determine necessary battery capacity
3. Select Batteries
– Choose batteries rated for 48V configuration
– Lithium: Higher density, longer lifespan
4. Wire Batteries in Series/Parallel
– Connect 2S/24P for 48V nominal
– Uses 24 batteries, 2 parallel groups of 12 batteries wired in series
5. Install Battery Management System
– Essential for lithium batteries
– Monitors voltage, current, temperature
– Helps prolong battery life
Connecting to Battery Bank
Here are the steps to connect your EG4 18k to a Battery Bank:
1. Safety precautions before connecting
– Ensure the inverter is completely off and disconnected from both AC and DC power sources before making any connections.
– Use rubber gloves and safety glasses to protect yourself from potential electrical hazards.
– Keep the work area clean and free of clutter to avoid accidental shorts or tripping hazards.
2. Using appropriate gauge wires
– Select high-quality DC cabling based on the recommended gauge for your specific battery bank voltage and distance.
– Measure the distance between the inverter and battery terminals, allowing for slack, and cut the cables accordingly.
– Strip the cable ends approximately 1/2 inch and professionally crimp compatible lugs onto each end.
3. Connecting to battery terminals
– Locate the designated positive and negative terminals on both the inverter and battery bank. Connect the positive cable lug (usually red) to the positive terminal on the inverter, followed by the positive terminal on the battery bank. Tighten all connections securely using wrenches.
– Repeat the above step for the negative cable lug (usually black), connecting it to the negative terminals on both the inverter and battery bank. Double-check all connections for tightness and proper polarity.
4. Verifying proper voltage
– Before turning on the inverter, use a multimeter to verify the battery bank voltage matches the specifications in the inverter manual.
– Recheck all connections for any loose cables, exposed wires, or potential safety hazards.
Bonus Tip: Consider using pre-wired battery boxes designed for the EG4 18k for a faster and potentially safer installation.
By following these steps carefully, you can connect your EG4 18k to your battery bank safely and efficiently, paving the way for a reliable and sustainable energy solution.
Configuring the Inverter
Once your EG4 18k is safely connected to the battery bank, it’s time to unlock its true potential through proper configuration. Here’s a step-by-step guide to optimize your setup:
1. Accessing the Settings Menu
– Navigate the settings either through the built-in LCD display or a dedicated configuration software using a PC or mobile device (refer to the inverter manual for specific instructions).
– Enter the administrative password to access advanced settings. Some features might require additional configuration or activation codes.
2. Battery Settings
– Lithium love: Locate the battery type setting and select “Lithium” to ensure compatibility with your chosen battery bank. This optimizes charging parameters and extends battery life.
3. Enable off-grid output
– Enable the “Off-grid Output” option if you want the inverter to power your home appliances directly from the battery bank during grid outages or intentional disconnect.
4. Setting charge/discharge parameters
– Define the minimum and maximum allowable battery charge and discharge levels to protect your battery from overcharging or deep discharge.
– If connected to the grid, configure the “Grid Charging Time” and “Grid Discharge Time” to prioritize self-consumption of solar energy and minimize reliance on the grid during peak energy cost periods.
5. Self-Consumption vs. Time-of-Use
– If prioritizing self-consumption is your goal, set the inverter to maximize solar energy utilization by powering your home first and exporting any excess to the grid (if allowed by your utility).
– If you have a Time-of-Use (TOU) electricity plan, configure the inverter to prioritize charging the battery during off-peak hours when electricity costs are lower and discharge to your home during peak hours when costs are higher.
6. Connecting Communication Cables (Optional)
– Connect compatible communication cables (Wi-Fi, Ethernet, etc.) to enable remote monitoring and management of your system through a dedicated app or web interface.
Reminder: Refer to the EG4 18k manual for specific configuration options and detailed instructions. Consult a qualified electrician if you’re unsure about any settings or procedures. Fine-tune your settings over time based on your specific energy usage patterns and preferences.
By following these steps and tailoring the configuration to your needs, you can unlock the full potential of your EG4 18k and enjoy a truly sustainable and efficient energy solution.
Connecting to Loads and Grid
Here are the step-by-step points for connecting loads and grid to the EG4 18k inverter:
1. Wire Backup Loads Panel
– Designate essential appliances and circuits
– Use transfer switch to critical loads subpanel
2. Connect to Grid via AC Couplings
– Attach L1/L2 terminals to grid step-down transformer
– Enables selling back excess solar power
3. Set Export Limit to Zero
– Configures self-consumption mode
– No selling back to grid
4. Enable Seamless Transfer
– Supports uninterrupted switching to backup loads panel
– For grid outages or complete off-grid
This covers the basics for wiring up backup loads as well as optional grid connections and selling excess solar power. The key settings allow prioritizing onsite consumption first before any export.
Monitoring and Updates
Here are the steps for monitoring and updating the EG4 18k inverter:
1. Access EG4 Monitoring App
– Connect inverter via built-in WiFi
– Or use 4G dongle or cellular modem
2. Monitor System via App/Web
– Check real-time power production
– View energy consumption data
– Change settings remotely
3. Review Energy Production/Use
– Generate production/consumption reports
– Help size system appropriately
– Identify issues needing troubleshooting
4. Update Firmware
– Check for new firmware versions periodically
– Download and install updates
– Keeps inverter optimized
The monitoring app and web dashboards enable keeping tabs on system performance. Regular firmware updates help fix bugs and improve functionality over time.
Monitoring and Updates
Here are the steps detailing the certifications and compliance held by the EG4 18k inverter:
1. ETL and cETL Certified
– Nationally recognized testing laboratory
– Certifies electrical safety and performance
2. Compliant with Safety Standards
– UL-1741 SB – Grid interconnection
– Rule 21 – California grid compliance
– NEC standards for electrical devices
3. Florida Solar Energy Center (FSEC)
– Certified for grid-tied systems
– Verified for grid export and EMC compliance
– Qualified for rebates and incentives
The independent testing and verification by well-recognized certification bodies demonstrates the regulatory and safety compliance of the EG4 18k. This qualifies and streamlines the approval process for installing this solar equipment in residential and commercial projects across the country.
Advantages and Disadvantages of 48V System
Here, are the advantages and disadvantages given below:
Advantages of a 48V System
1. 48V systems are known for their efficiency in power transmission and distribution.
2. Higher voltage systems like 48V allow for the transmission of the same amount of power with lower current, reducing resistive losses in wiring.
3. 48V is a standard voltage level for many power systems, allowing for compatibility and ease of integration with various devices.
4. 48V systems often provide improved battery performance, with lower charging and discharging currents for the same power levels.
5. Many power electronics components and devices are designed to operate optimally at 48V, enhancing compatibility and reducing the need for additional converters.
Disadvantages of a 48V System
1. Higher voltage systems can pose increased safety risks, requiring careful consideration of safety measures during installation and maintenance.
2. Implementing a 48V system may involve higher upfront costs for specialized equipment and components.
3. Higher voltage systems may have limitations on the distance over which power can be efficiently transmitted without significant losses.
4. Higher voltage systems may introduce complexity in terms of system design, installation, and maintenance.
EG4 18K PV Hybrid Solar Inverter: Benefits and Drawbacks
The potential benefits and drawbacks of EG4 18K is given below:
Benefits of EG4 18K PV Hybrid Solar Inverter
1. The EG4 18K offers a substantial power capacity, with the ability to utilize 18,000 watts from a PV array.
2. It seamlessly integrates grid-tied and off-grid capabilities, providing a versatile solution for various solar applications.
3. The inverter boasts impressive surge capacities, ensuring reliable operation during peak demand or unexpected power spikes.
4. Equipped with advanced algorithms, the inverter optimizes energy utilization by intelligently balancing solar input, battery storage, and grid power.
5. The EG4 18K comes with remote monitoring capabilities, allowing users to monitor system performance and update firmware from anywhere.
Drawbacks of EG4 18K PV Hybrid Solar Inverter
1. Installation may require careful consideration of spacing, mounting, and connection details, potentially requiring professional assistance.
2. The upfront cost of the EG4 18K inverter may be relatively high, especially when considering additional components for a complete energy storage system.
3. Users need to adhere to safety measures during installation, including proper handling of wires, breaker positions, and polarity checks.
Questions & Answers (Q&A)
Q1. What battery capacity is ideal for a 4-5 kW system?
A: For a 4-5kW system, a minimum 100Ah 48V lithium battery bank (4.8kWh) is recommended. Upsize as needed.
Q2. Can the EG4 18k be installed indoors?
A: Yes, the EG4 18k has an IP66 rating so it can be installed indoors but ensures adequate ventilation.
Q3. What wire gauge should be used for battery connections?
A: For 48V systems, recommended wire gauge is 4 AWG for runs up to 5 feet. Size accordingly.
Q4. How often should the firmware be updated?
A: EG4 recommends checking for firmware updates every 2-3 months and installing if available via the monitoring app.
Q5. Can I expand the system?
A: Yes! You can parallel up to 10 inverters and connect each to up to 5 PowerPro batteries, creating a scalable energy powerhouse for your needs.
End Notes
Configuring and installing the feature-packed EG4 18k inverter enables tapping into the full potential of 48V solar energy systems. Following the key steps outlined ensures properly sized batteries, correct system programming, and secure mounting suited for 18kW equipment. Utilizing quality components like the outdoor-rated EG4 unit makes embracing renewable energy smooth, reliable and uncomplicated. The roadmap has been laid for robust off-grid or grid-tied function. Now is the time to leverage 48V stability on your journey to energy independence.