Why Are My Brand New Solar Lights Not Working? An In-Depth Troubleshooting Guide
As a home improvement professional with over 10 years of experience installing and maintaining solar lighting systems, I often get asked why brand-new solar lights sometimes fail to operate properly right out of the box. While frustrating, troubleshooting new solar lights that won’t turn on or stay lit is usually straightforward once you understand the key components and how they work together.
In this comprehensive troubleshooting guide, I will walk you step-by-step through the solar lighting system, explain the role of each component, identify common failure points, and provide solutions to get your new solar lights working properly. Whether you recently purchased solar path lights, spotlights, or decorative accent lighting, the same principles apply.
How Do Solar Lights Work?
Before jumping into troubleshooting, it helps to have a basic grasp of how solar lighting systems function:
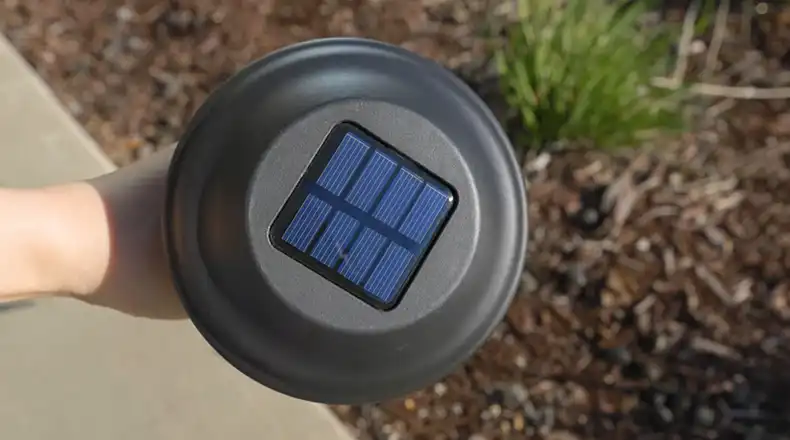
Solar Panel – Made of photovoltaic silicon cells that convert sunlight (photons) into electrical current (voltage). This charges the battery during daylight hours.
Battery – Typically nickel-cadmium rechargeable batteries that store power from the solar panel and provide electricity at night to illuminate the light.
Light Source – Usually LED bulbs in modern solar lights consume very little stored power and can last for years.
Controller – Sophisticated control box with sensors and switching mechanism to optimize battery charging, and regulate illumination time and brightness.
Working in unison, these components utilize renewable solar energy to deliver continuous outdoor lighting without any wiring or electricity.
Step-by-Step Solar Light Troubleshooting
With a handle on the key pieces of solar lighting technology, we can now focus on getting your new solar lights operational. I recommend following this structured troubleshooting approach:
1. Verify Proper Solar Exposure
Lack of sufficient sunlight is the number one reason brand-new solar lights fail to work properly. For optimal solar charging, the solar panel needs direct exposure for 6-8 hours per day year-round. Keep these solar exposure tips in mind –
Install solar lights in locations with consistent sun access, avoiding shaded areas or seasonal shade from trees and buildings. Southern exposures are best in the northern hemisphere.
Clear any debris like leaves, dirt, or snow off the solar panels, which can easily block needed sunlight if left to accumulate.
In northern climates, adjust the angle of the solar panel during winter months to account for fewer daylight hours and lower sun angles.
2. Inspect All Components
Carefully examine each solar lighting component before installation to catch any out-of-box defects or shipping damage.
Solar Panel – Check for cracks or loose wires. Look for an internal buildup of condensation or fogging.
Battery – Look for corrosion or leaks around the battery compartment. An inactive pull tab may need removal.
Light Fixture – Ensure no physical damage. Check the tightness of connections and fixture seal integrity.
Sensors & Switches – Test the functionality of any sensors and power switches.
During periodic solar light maintenance, repeat this inspection process to identify any developing integrity issues over months and years installed outside.
3. Check Battery Voltage & Operation
An improperly installed, faulty, or dead battery is a very common culprit when solar lights won’t turn on.
Test battery voltage using a digital voltmeter. Compared to manufacturer specifications – generally 1.2 to 1.5 V rechargeable nickel-cadmium AA or AAA batteries.
Check the correct battery polarity alignment. Reverse orientation will prevent charging and operation.
Look for battery leakage or bulging casing indicating the need for immediate replacement.
Allow 1-2 sunny days after installation for the initial battery charge before expecting full runtime performance.
Keep extra batteries on hand so dead ones can be swapped out immediately.
4. Ensure Proper Electrical Connections
Another oversight that keeps new solar lights from working is loose internal wiring or disconnected circuitry inside the light housing.
Carefully inspect connection points between the solar panel, battery, controller, and LED lights.
Check for pinched wires or any gaps/corrosion at solder joints and wire terminals.
Confirm waterproof connectors and gaskets are fully seated to avoid moisture damage.
Use a multi-meter in conductivity test mode to verify end-to-end current flow.
Be certain to confirm electrically conductive paths leaving nothing to chance inside the solar housing.
5. Reset Electronic Controls
Today’s solar lights have sophisticated self-contained electronic controls with multiple modes and settings that occasionally need resetting.
Many controllers have master power switches, test buttons, and auto functions to override darkness sensors.
Experiment with power cycling and testing different switch combinations.
Let the controller run an auto-learn cycle over several day/night cycles after any major changes.
Factory reset may be necessary if settings are scrambled and normal operation remains elusive.
Don’t hesitate to play around with electronic control configurations to encourage a system reboot.
When To Return vs Replace Solar Lights
If you have patiently tried all troubleshooting recommendations and brand-new solar lights refuse to operate as advertised, it becomes an evaluation of whether the system requires replacement versus returning the items.
Consider Replacement In These Situations:
Visible Physical Damage – Cracked solar panel glass, ripped wires, broken battery clips, etc.
Moisture & Water Infiltration – Fogging inside glass, widespread corrosion, fluid puddling
Intermittent Operation – Solar lights only work sometimes usually points to internal shorting
Excessively Short Run Time – Less than 50% of normal hours indicates a weak battery or bad solar cell
Old Age – Most solar lights last 2-5 years before needing replacement
Consider Return/Refund If:
Immediately Dead Out Of Box – Strong sign of manufacturing defect
Wrong Item Shipped – Always verify the correct solar light model/spec received
Well Within Sale Terms – Check return policy timeframes and conditions
Packaging Is Pristine – Vendors require all original packaging for returns
With proof of purchase and warranty documentation, returning truly non-working units from the outset is often more sensible than replacement. Check manufacturer policies regarding reimbursement of return shipping fees.
Let There Be Light!
I hope this end-to-end troubleshooting guide gives you the confidence and insights needed to get frustratingly dark solar lights shining brightly once again. Reach out with any questions as you embark on diagnosing and correcting new solar lighting issues – happy to help anytime!